Introduction to Old-Fashioned Butter Mints
A nostalgic treat that everyone loves
There’s something incredibly comforting about enjoying old-fashioned butter mints. These little, melt-in-your-mouth candies have been a beloved treat for generations, evoking memories of family gatherings, holiday celebrations, and quaint events. They were originally popularized in the mid-20th century, often found at weddings, church picnics, and even dentist offices as a sweet remedy after check-ups. With their rich buttery flavor and creamy texture, it’s no wonder that they have stood the test of time.
Not only are these treats delicious, but they also have a unique charm that makes them relatable to everyone. Think about it—who doesn’t have a sweet memory tied to sharing butter mints with a loved one? These candies can easily transport you back to simpler times. Plus, the delightful pastel colors they come in make them visually appealing, adding a festive touch to any occasion.
Why homemade butter mints make the best gifts
In today’s fast-paced world, giving a thoughtful gift can sometimes feel challenging. That’s where homemade old-fashioned butter mints come in! They’re not just candies; they’re little pockets of care that you can share with friends and family. Imagine showing up at a gathering with a beautifully arranged box of these delightful mints. Everyone will appreciate the time and effort you put into creating something unique.
Homemade goodies like butter mints can actually stir deeper emotional connections. According to a study by the University of Leeds, personalized gifts tend to evoke stronger feelings of gratitude and happiness—and what better way to achieve that than with something you made yourself? If you’re looking for ways to personalize your treat, consider experimenting with different flavors or shapes. Mint, cinnamon, or even chocolate variations could add a delightful twist to the classic recipe.
Whether it’s a birthday, a holiday, or just because, homemade butter mints make for a delightful gift that your loved ones are sure to cherish. So gather your ingredients, roll up your sleeves, and prepare to create some delicious memories with old-fashioned butter mints!
Ingredients for Old-Fashioned Butter Mints
Essential ingredients for the perfect butter mints
When you’re ready to create your own old-fashioned butter mints, start with these must-have ingredients:
- Powdered Sugar: The star of the show. This gives your mints that melt-in-your-mouth texture.
- Butter: Use softened, unsalted butter for the best flavor.
- Milk: Just a splash helps to bring everything together and provides a creamy consistency.
- Peppermint Extract: This adds that classic minty zing. You can also try spearmint for a different twist.
- Food Coloring: A few drops allow you to personalize your mints for any occasion, whether it’s a wedding or holiday gathering.
Optional ingredients to customize your mints
Feeling adventurous? Consider these optional ingredients to elevate your old-fashioned butter mints:
- Flavored Extracts: Vanilla or almond extracts can offer unique flavors.
- Crushed Candy Canes: For a fun, festive touch during the holidays.
- Cocoa Powder or Chocolate Chips: Perfect for a chocolatey alternative.
Experimenting with these flavors lets you tailor your mints to match your preferences. Cooking can be a joy when you play with different tastes! If you’re curious about flavor combinations, take a look at this Flavor Pairing Guide.
Now, are you ready to whip up some delicious, nostalgic treats? Let’s get cooking!
Step-by-step Preparation of Old-Fashioned Butter Mints
Making old-fashioned butter mints is a delightful experience, and it’s not just about the sweet treat; it’s about the memories you’ll create while making them. Whether you’re preparing them for a wedding, a holiday gathering, or just because, let’s dive into the step-by-step process to create these melt-in-your-mouth confections.
Setting Up Your Workspace and Gathering Ingredients
Before you begin, a little preparation goes a long way. Set up a clean, spacious area in your kitchen where you can work comfortably.
Here’s what you’ll need:
- 1/2 cup unsalted butter, softened
- 4 cups powdered sugar, sifted
- 1-2 tablespoons milk (for smoother consistency)
- 1 teaspoon peppermint extract (or your choice of flavor)
- A few drops of food coloring (optional)
- Cornstarch (for dusting)
Ensure you have a large mixing bowl, a sturdy spatula, and a clean counter or cutting board ready. Having everything prepped and organized makes the process smoother and more enjoyable. You can also check out this guide for tips on making an efficient kitchen workspace.
Mixing the Butter for a Creamy Texture
In your mixing bowl, add the softened unsalted butter. Using a spatula or hand mixer, beat the butter until it becomes light and creamy. This usually takes about 2-3 minutes. A well-creamed butter is key to achieving the luscious texture those old-fashioned butter mints are known for. If you enjoy baking as much as I do, you’ll appreciate the satisfaction of watching the butter transform!
Combining the Remaining Ingredients for Dough Formation
Once your butter is perfectly creamy, it’s time to bring the rest of the ingredients into play. Gradually add in the powdered sugar, mixing it in slowly to prevent a sugar cloud. Then, introduce the peppermint extract and milk. The former provides that essential minty flavor, while the latter ensures your dough maintains the right consistency.
Keep mixing until everything is well combined, and the mixture resembles a thick, pliable dough. You might need to adjust the milk quantity depending on the humidity in your kitchen, so aim for a consistency that holds together but isn’t sticky.
Kneading and Coloring the Mint Dough
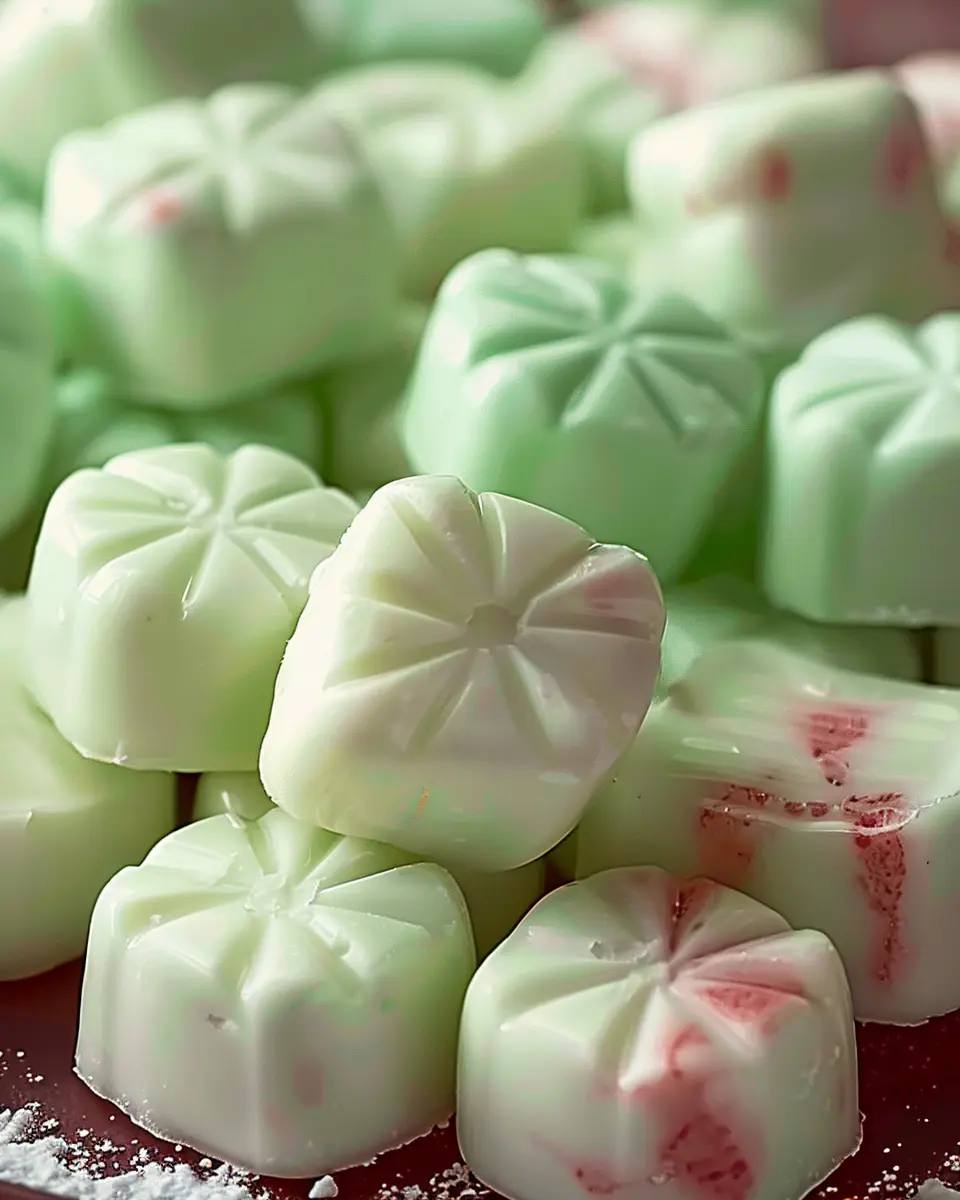
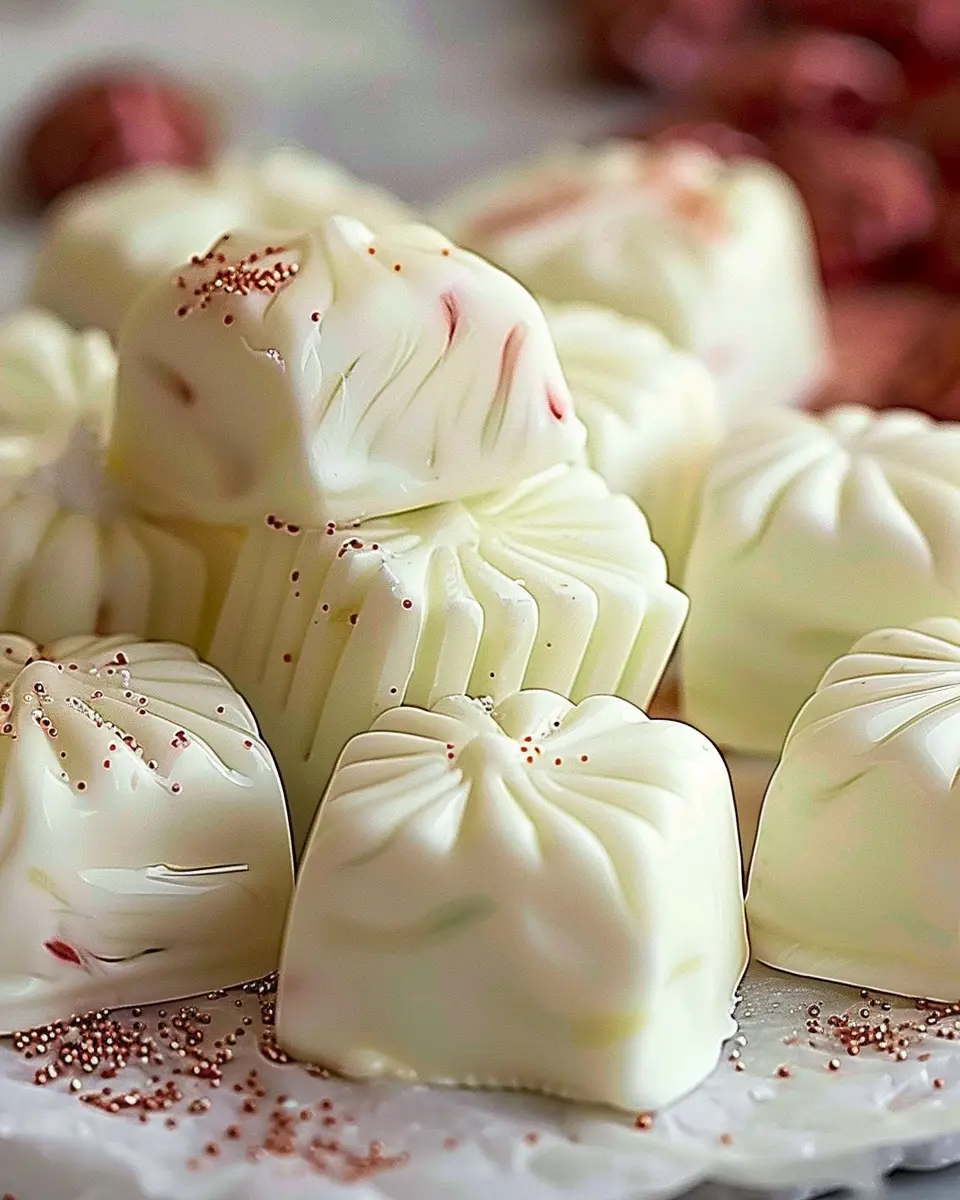
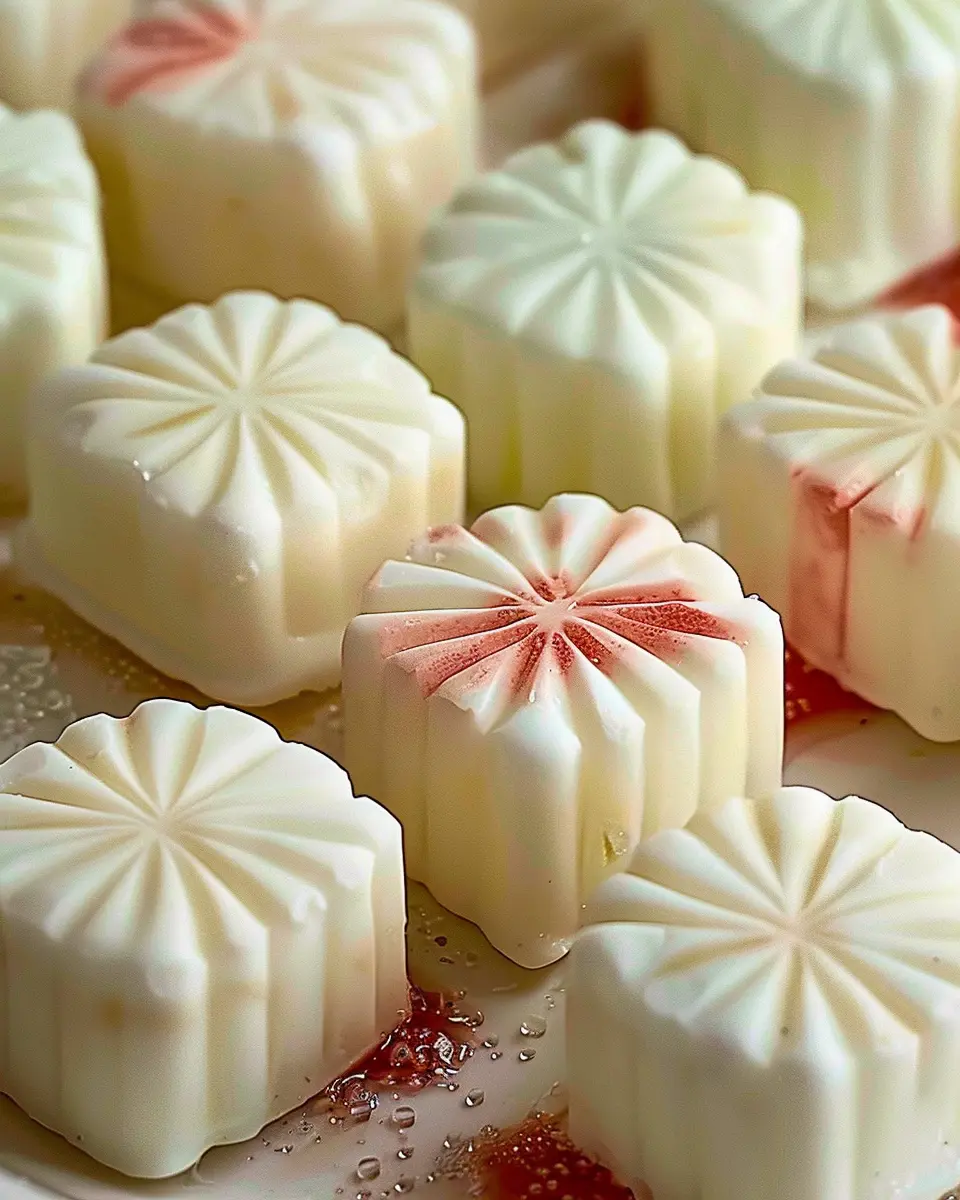
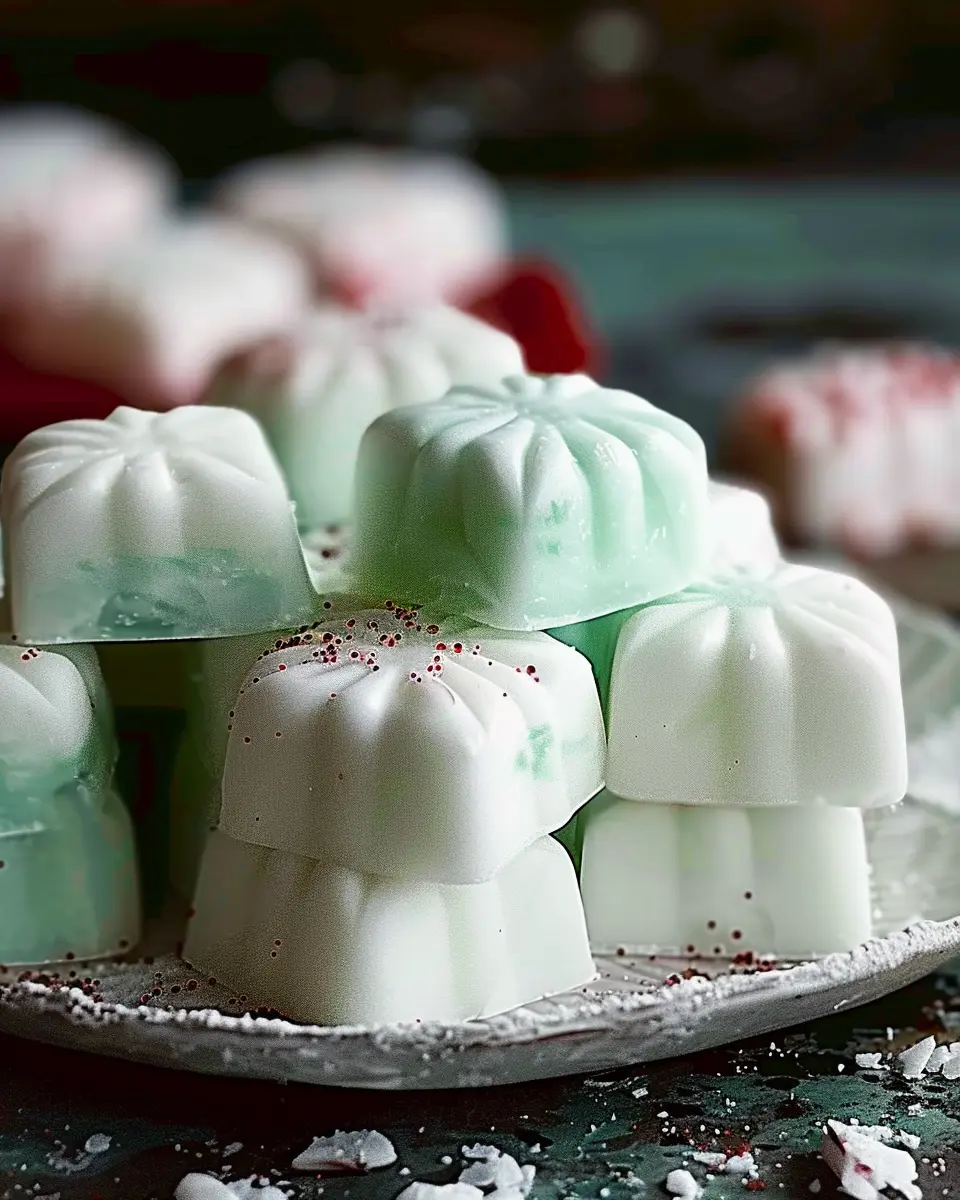
Now comes the fun part: kneading! Lightly dust your countertop with cornstarch to prevent sticking, and transfer the dough onto it. Knead the mixture for about 2 minutes until it becomes smooth and elastic. If you want to add color, divide the dough into portions and incorporate drops of food coloring into each. I love pastel shades for a whimsical look, but feel free to let your creativity shine—maybe a festive red and green for the holidays?
Shaping the Mints into Bite-Sized Pieces
Once you’ve achieved the desired color, it’s time to shape your mints! Roll small pieces of dough into balls (about 1/2 inch in diameter). Then, use a fork or your fingers to slightly flatten each ball. This not only gives them a charming look but also ensures they dry evenly.
Here’s a tip: if you have a mini cookie scoop, it can be a great tool for making uniform mints!
Understanding the Critical Drying Process
After shaping your old-fashioned butter mints, transfer them onto a parchment-lined baking sheet. Allow them to sit at room temperature for at least 12 hours to dry. This step is crucial; it helps the mints firm up and enhances their melt-in-your-mouth experience. Keep them in a cool, dry spot away from direct sunlight.
When they’re done drying, store your butter mints in an airtight container. They can last for weeks! And just like that, you have a delightful treat ready to impress your friends and family.
Now, grab that glass of milk or cup of tea and indulge in your homemade creations! If you’re interested in crafting more sweet confections, consider checking out more candy recipes to expand your kitchen adventures. Happy mint-making!
Variations on Old-Fashioned Butter Mints
Old-fashioned butter mints are a timeless treat, but who says we can’t give them a little twist? Let’s explore some delightful variations that will elevate your classic recipe to new heights.
Chocolate butter mints for a twist
For chocolate lovers, incorporating cocoa powder or melted chocolate into your old-fashioned butter mints creates a decadent surprise. You can create a swirled effect by combining chocolate and vanilla mints in the same batch, forming an eye-catching treat that’s also delicious. Just replace part of the powdered sugar with cocoa powder to achieve a rich flavor. Remember, a drizzle of melted dark chocolate on top can add sophistication and a touch of decadence.
Seasonal flavors for holiday celebrations
What’s more delightful than crafting seasonal variations of old-fashioned butter mints? For the winter holidays, consider adding a hint of peppermint extract, or even better, candy cane pieces folded into the mixture. In the fall, a dash of cinnamon or pumpkin spice can give these mints a cozy twist, perfect for those festive gatherings. Come spring, consider infusing your mints with fruity flavors like lemon or strawberry for a refreshing treat that speaks to the season.
Feeling inspired? These variations not only offer a playful take on past recipes but also allow you to cater to different tastes and occasions. Whether for a child’s birthday party or a sophisticated adult gathering, the possibilities are endless. Check out more creative ideas on sites like Food52 or Bon Appétit to inspire your next mint-making adventure!
Cooking Tips and Notes for Old-Fashioned Butter Mints
Achieving the right texture every time
When it comes to making old-fashioned butter mints, texture is key. You want them to be soft and creamy, yet firm enough to hold their shape. To get it just right, be mindful of the amount of powdered sugar you add. Start with a lesser amount and mix until you reach a pliable consistency. A great tip is to use your hands for the final mixing, as it helps you gauge the texture better. Did you know that humidity can affect candy making? On particularly humid days, you may need a bit more sugar to maintain that ideal texture.
Importance of letting mints dry properly
After shaping your old-fashioned butter mints, resist the urge to nibble right away! Allow them to dry for at least several hours or overnight for best results. This drying period not only firms them up but also helps them to develop their signature melt-in-your-mouth quality. If you’re short on time, a gentle breeze from a fan can speed up the drying process.
For more useful tips on candy making, consider checking reputable sources like Serious Eats or The Kitchn. Happy mint-making!
Serving Suggestions for Old-Fashioned Butter Mints
Making old-fashioned butter mints might be the highlight of your dessert repertoire, but how you serve them can elevate your homemade treats even more!
Perfect Pairings for Your Butter Mints
These delightful mints are perfect not just on their own but also harmonize beautifully with other treats. Consider serving them alongside:
- Freshly brewed coffee or tea: The creamy sweetness of the mints complements a robust coffee or a soothing herbal tea perfectly.
- Sliced fruit and nuts: Create a lovely platter with apple slices, almonds, and walnuts to contrast the minty flavor with something crunchy and fruity.
- Cheese platters: Try them with creamy cheeses like Brie or tangy varieties such as goat cheese for an unexpected flavor twist.
Creative Ways to Serve and Gift Your Mints
Don’t just make old-fashioned butter mints for personal enjoyment; they also make fantastic gifts! Here are a few creative ideas:
- Presentation in jars: Layer your mints in a decorative glass jar tied with a ribbon. This not only looks appealing but also keeps them fresh!
- Event favors: For weddings or showers, consider putting mints in small organza bags as sweet parting gifts for guests.
- Seasonal treats: Customize colors for holidays, like pastels for Easter or rich reds and greens for Christmas, to add a festive flair.
For more inspiration on creative gifting, check out this inspiring gifting guide. When you combine your old-fashioned butter mints with these serving suggestions, you’re sure to impress!
Time Breakdown for Old-Fashioned Butter Mints
Preparation time
Making old-fashioned butter mints is a delightful journey that begins with just 20 minutes of preparation. Gather your ingredients, including butter, powdered sugar, and flavoring, and you’ll be well on your way to crafting these classic treats. It’s a simple process that requires no prior baking experience—perfect for those looking for a nostalgic touch.
Drying time
After shaping your mints, you’ll need to allow them to dry for about 2 to 4 hours. This step is crucial, as it gives the mints that perfect texture we all remember. To ensure optimal drying, place them in a cool area away from moisture.
Total time
In total, you’re looking at around 2 hours and 20 minutes from start to finish, including the drying time. With this manageable timeline, you can whip up a delightful batch of old-fashioned butter mints for any occasion, whether it’s a holiday gathering, a wedding, or simply a sweet treat for yourself. Think of all the smiles these nostalgic candies will bring!
For additional tips on candy-making, consider checking out sources like The Spruce Eats or Food Network. These sites can provide you with even more inspiration for your sweet creations.
Nutritional Facts for Old-Fashioned Butter Mints
Serving Size and Calories
When enjoying old-fashioned butter mints, it’s good to know what you’re indulging in. A typical serving size is about 4-5 pieces, which contains roughly 120 calories. These delightful mints are rich in flavor but can be enjoyed in moderation, making them the perfect sweet treat for special occasions or a post-dinner palate cleanser.
Other Nutritional Information
Beyond calories, old-fashioned butter mints contain:
- Total Fat: 5g (primarily from butter)
- Saturated Fat: 3g
- Sodium: 5mg
- Carbohydrates: 18g
- Sugar: 15g
- Protein: 0g
While these mints are certainly a dessert indulgence, they can be a delightful part of your celebration snacks. Just remember to balance them with a nutritious diet! Curious about healthier alternatives? Check out this guideline on desserts recommended by nutrition experts.
It’s all about moderation and treating yourself without going overboard!
FAQs about Old-Fashioned Butter Mints
Can I use different extracts or flavors?
Absolutely! While the classic flavor of old-fashioned butter mints is undeniably delightful, you can easily experiment with various extracts to suit your taste. For instance, peppermint, spearmint, or even orange extract can offer a refreshing twist. Feel like getting adventurous? Why not mix a couple of flavors together to create a unique minty treat! Just remember to adjust the quantity to keep the flavors balanced—start with a teaspoon and adjust from there.
How should I store my butter mints?
To keep your old-fashioned butter mints fresh, it’s essential to store them properly. Place them in an airtight container at room temperature for up to two weeks. If you want to extend their shelf life, you can refrigerate them. Just be aware that cold storage may affect their texture. For longer storage, consider freezing them in a sealed bag or container. Just let them come to room temperature before enjoying again.
What is the best way to customize the color and shape?
Customizing the color and shape of your old-fashioned butter mints is part of the fun! You can add a few drops of food coloring to the dough before shaping. Light pastel colors work wonderfully for a nostalgic feel. Shape them into small balls, or roll them out and use cookie cutters for different designs. If you want a festive flair, consider pressing them into molds—perfect for special occasions or holidays.
For more tips on flavor and storage, visit sources like Food Network or Martha Stewart to expand your culinary creativity!
Conclusion on Old-Fashioned Butter Mints
Recap of Why These Mints Are a Beloved Classic
Old-fashioned butter mints have a timeless charm that brings back memories of family gatherings and special occasions. Their creamy texture and sweet, buttery flavor make them irresistible. Whether served at weddings or holiday get-togethers, these mints are more than just a treat; they’re a nostalgic connection to simpler times.
Encouragement to Try Making Them at Home
Why not try your hand at making old-fashioned butter mints in your kitchen? It’s a fun, rewarding project that’s surprisingly easy and lets you customize flavors to suit your taste. Plus, homemade treats always add a personal touch to any event. So gather your ingredients, roll up those sleeves, and enjoy the delightful process of creating these sweet candies! For inspiration, check out this butter mint history for a deeper appreciation of their legacy.
PrintOld-Fashioned Butter Mints: The Best Homemade Treats for Sweet Moments
Delight in the nostalgic taste of old-fashioned butter mints, perfect for special occasions.
- Prep Time: 20 minutes
- Cook Time: 0 minutes
- Total Time: 2 hours
- Yield: Approximately 30 mints
- Category: Dessert
- Method: No-bake
- Cuisine: American
- Diet: Vegetarian
Ingredients
- 2 cups confectioners’ sugar
- 1/4 cup unsalted butter, softened
- 2 tablespoons milk
- 1/2 teaspoon peppermint extract
- 1/4 teaspoon salt
- Food coloring (optional)
Instructions
- In a mixing bowl, combine confectioners’ sugar and softened butter.
- Add milk, peppermint extract, and salt. Mix until smooth.
- If desired, add food coloring and mix until evenly colored.
- Scoop small amounts of the mixture and shape into balls or mints.
- Place on wax paper and let them dry for several hours.
Notes
- Adjust the amount of peppermint extract based on your taste preference.
- Store in an airtight container to maintain freshness.
Nutrition
- Serving Size: 1 mint
- Calories: 40
- Sugar: 10g
- Sodium: 30mg
- Fat: 1.5g
- Saturated Fat: 1g
- Unsaturated Fat: 0.5g
- Trans Fat: 0g
- Carbohydrates: 9g
- Fiber: 0g
- Protein: 0g
- Cholesterol: 5mg