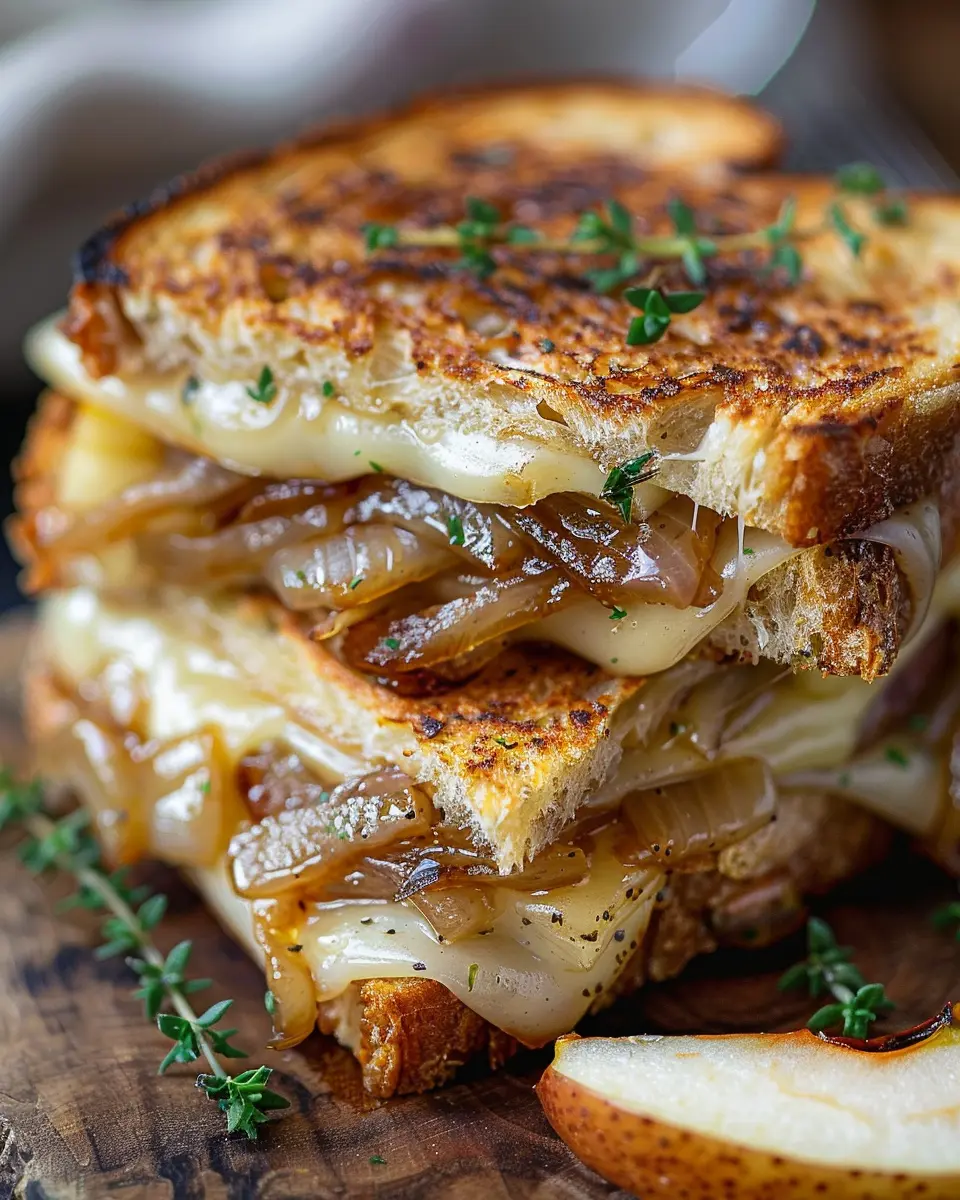
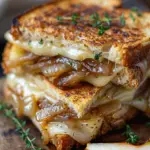
Introduction to Pear Apple Grilled Cheese
When was the last time you experienced a dish that ignited all your senses? If you haven’t tried pear apple grilled cheese, you’re in for a delightful surprise. This innovative twist on the classic grilled cheese pairs crisp fruits with savory cheese, creating a dish that’s not only comforting but also refreshingly unique. Imagine biting into warm, gooey cheese melting into sweet, caramelized onions, accompanied by the subtle sweetness of pears and apples. Intrigued yet?
Why Choose a Pear Apple Grilled Cheese?
You might be wondering why you’d want to venture beyond the traditional grilled cheese. The pear apple grilled cheese offers a symphony of flavors that highlights the beauty of seasonal produce. Pears and apples are rich in vitamins and fiber, making this dish a guilt-free indulgence. Did you know that both fruits contain antioxidants known for their heart-health benefits? Incorporating them into your meals allows you to enjoy something delicious while nourishing your body.
But let’s talk about versatility. This recipe works as a quick weeknight dinner, a brunch delight, or even a party appetizer. Pair it with a simple side salad and a light, sparkling soda for a carefree yet sophisticated meal. The robust flavor profile, thanks to the caramelized onions, balances beautifully with the sweet notes from the fruit, creating a harmony that keeps you coming back for more.
Even if you’re tight on time, this dish can be assembled in under 30 minutes, making it perfect for young professionals balancing busy schedules. Plus, it’s utterly customizable; toss in some turkey bacon or chicken ham if you want to add protein, or play around with your favorite types of cheese for a unique spin.
If you’re ready to awaken your taste buds and impress your friends with a dish that makes simple ingredients feel extraordinary, then the pear apple grilled cheese is calling your name. Dive into the recipe that will undoubtedly elevate your dining experience. And don’t forget to check out additional tips for mastering caramelized onions here. Happy cooking!
Ingredients for Pear Apple Grilled Cheese
When crafting your delightful pear apple grilled cheese sandwich, it’s all about selecting fresh, high-quality ingredients that elevate your meal. Here’s what you’ll need:
- Bread: Choose a hearty, rustic bread like sourdough or whole grain for that satisfying crunch and flavor.
- Cheese: Opt for a creamy cheese like goat cheese or sharp cheddar for a perfect balance with the sweet fruits.
- Fruits: Grab one ripe pear and one crisp apple. Varieties like Bosc pears and Granny Smith apples work beautifully together.
- Turkey Bacon: For a savory touch, turkey bacon adds a lovely, smoky flavor that complements the sweetness of the fruits.
- Chicken Ham: If you prefer something lighter, chicken ham provides a subtle, savory element without overshadowing the dish.
- Onions: Don’t forget about caramelized onions! Their sweetness plays a crucial role in creating that perfect flavor profile.
- Butter or Olive Oil: Use this for grilling your sandwich, giving it a golden, crunchy finish.
Each ingredient contributes to the magic of this recipe, making it more than just a meal; it’s an experience! For tips on selecting the best produce, consider resources like Fresh Fruits and Vegetables. So, are you ready to indulge in this unique twist on a classic?
Preparing Pear Apple Grilled Cheese
Creating a pear apple grilled cheese is a delightful way to elevate the classic comfort food. This unique twist combines the sweetness of fruit with the savory meltiness of cheese, all crowned with the rich flavor of caramelized onions. Ready to get started? Let’s dive into the preparation!
Gather Your Ingredients
Before you embark on this delicious adventure, it’s essential to gather everything you need. Here’s a handy checklist to make your experience smooth:
- Bread: Choose your favorite type—sourdough or multigrain are great for added texture.
- Cheese: A good melting cheese like Gruyère or sharp cheddar works wonders.
- Fruits: Select ripe pears and crisp apples; both should be juicy and sweet.
- Turkey bacon or chicken ham: This will provide a savory touch to complement the sweetness of the fruits.
- Onions: One medium onion will do for caramelizing.
- Butter: For grilling the sandwich.
- Honey or a fruit jam (optional): For an additional layer of flavor.
Having these ingredients ready not only streamlines the process but also enhances your cooking experience. Curious about the nutritional benefits of pears and apples? They are packed with vitamins and fiber. Check out more about their health benefits here and here.
Caramelize the Onions
This step is where the magic happens. Caramelized onions add a rich sweetness and depth to your pear apple grilled cheese. Here’s how to do it:
- Slice the Onions: Thinly slice your medium onion for quicker caramelization.
- Heat a Pan: Place a non-stick pan over medium heat and add a tablespoon of butter.
- Cook the Onions: Once the butter begins to bubble, add the sliced onions. Stir frequently, allowing them to soften and turn golden, which should take about 20-25 minutes. For added flavor, sprinkle a pinch of salt or a drizzle of honey halfway through.
While you’re waiting, you can think about how this step elevates the sandwich from ordinary to extraordinary. The sweet, caramelized notes are something your taste buds will thank you for later!
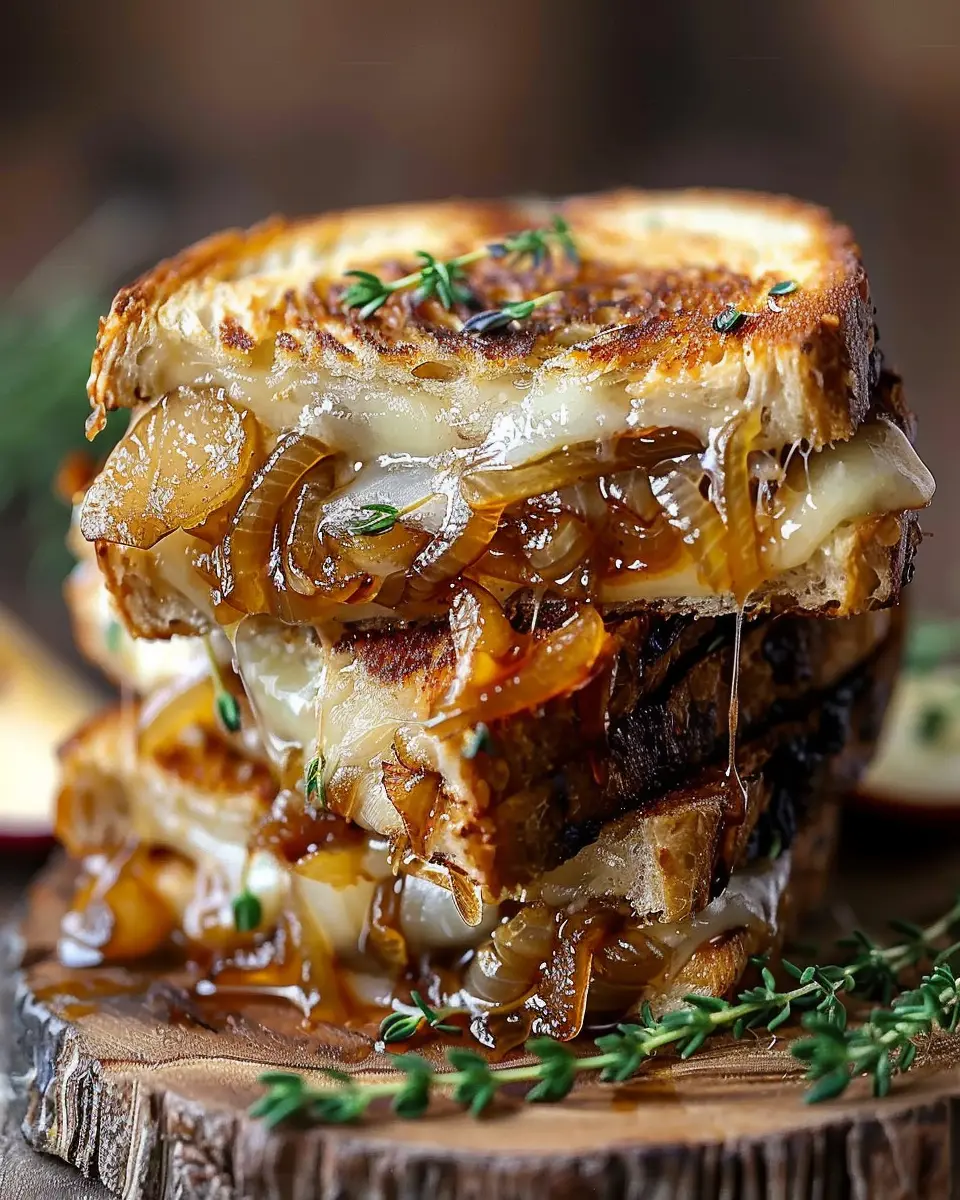
Assemble the Sandwich
Now that your onions are ready, it’s time to bring the pear apple grilled cheese together. Here’s how:
- Lay Down the Foundation: On a slice of bread, layer your cheese followed by slices of pear and apple.
- Add the Protein: Place your turkey bacon or chicken ham on top of the fruit.
- Top It Off: Spoon on a generous helping of the caramelized onions and finish with another slice of cheese. This layering ensures that everything sticks together during grilling.
- Seal It: Place the final slice of bread on top, creating a complete sandwich.
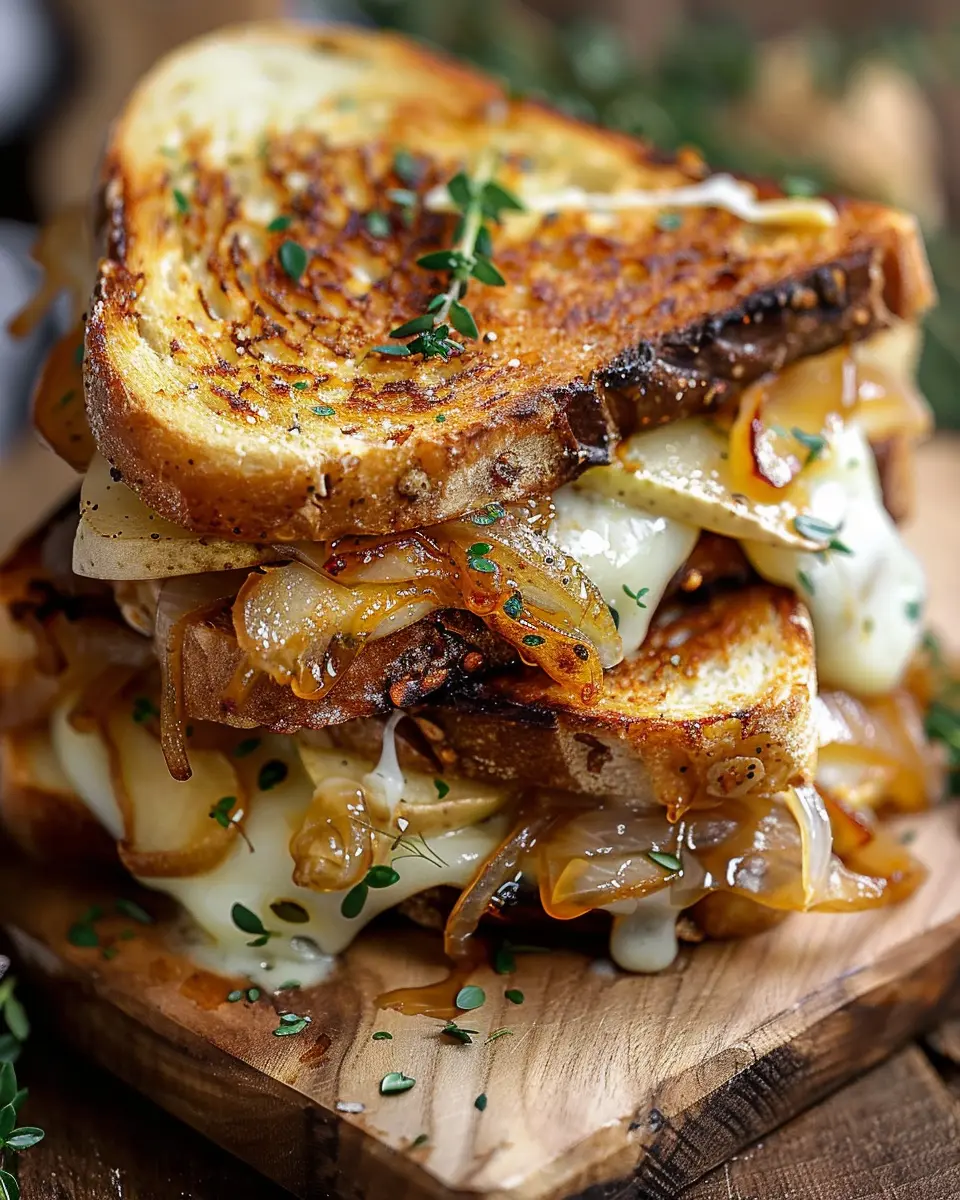
Grill to Perfection
With your sandwich assembled, it’s time to grill it to crispy, gooey perfection:
- Heat the Pan: Wipe the pan clean, and add another tablespoon of butter over medium heat.
- Grill: Once the butter is melted, carefully place your sandwich in the pan. Grill for about 4-5 minutes on each side. You’re aiming for a golden-brown crust and that melty cheese interior.
- Weight: If you want a deliciously pressed effect, consider using a heavy pan as a weight on top of the sandwich while it cooks.
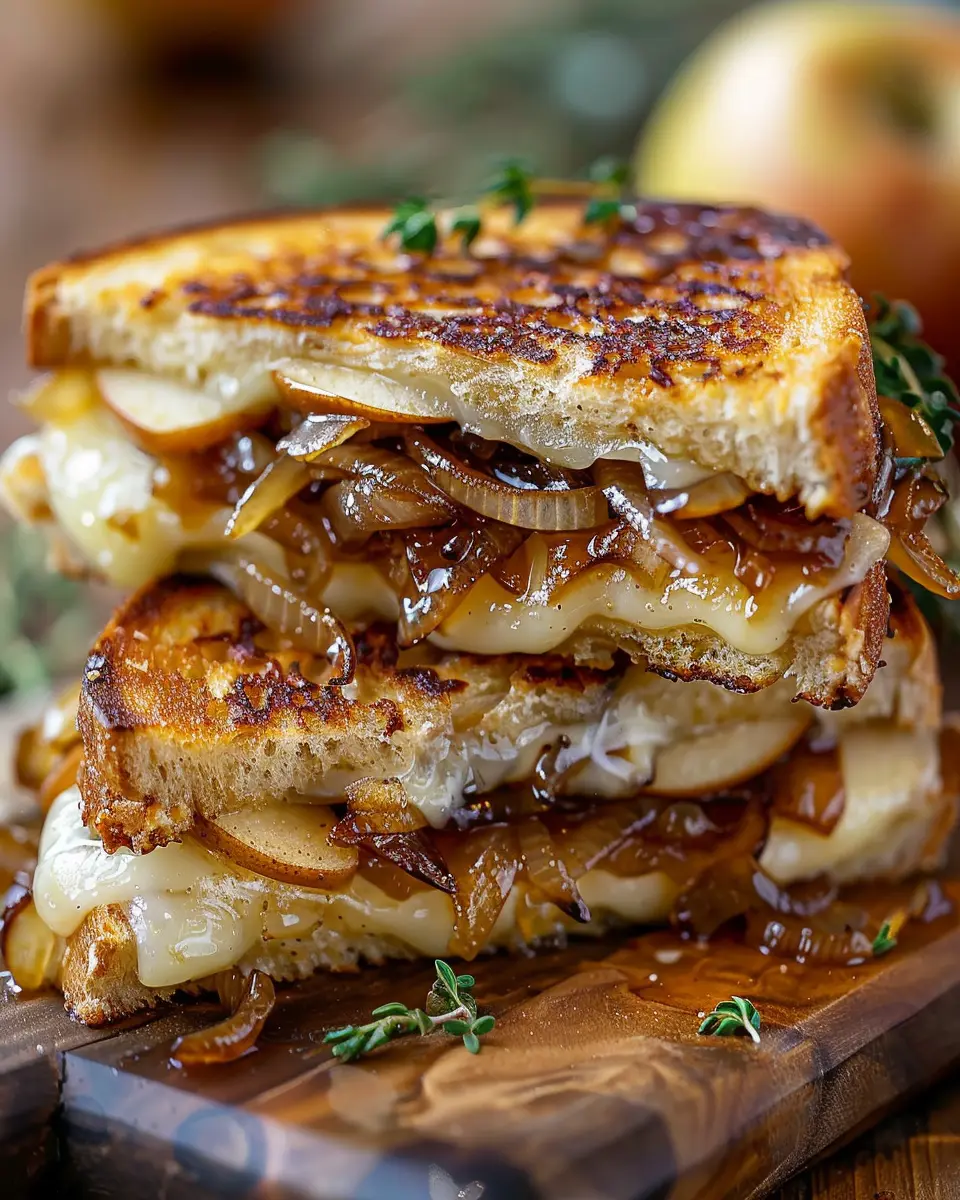
Slice and Serve
The moment of truth is here! Once both sides are beautifully golden, carefully transfer the sandwich to a cutting board. Allow it to cool for about a minute before slicing it diagonally. This not only makes it easier to handle but also showcases those gorgeous layers.
Serve your pear apple grilled cheese with a side of mixed greens or a warm cup of soup. Trust me, you’ll love how each bite delivers a delightful balance of sweet and savory. Enjoy your creation and get ready for the compliments that are sure to follow!
Variations on Pear Apple Grilled Cheese
Add Some Turkey Bacon for Crunch
Want to elevate your pear apple grilled cheese to another level? Why not add some crispy turkey bacon? The savory and smoky flavor of turkey bacon is a delightful contrast to the sweetness of the pears and apples, offering a satisfying crunch with each bite. Just crisp it up in a skillet before layering it with the cheese and fruits. Believe me, the combination will make your sandwich feel luxurious and hearty—perfect for those days when you need a meal that’s both comforting and filling.
Experiment with Different Cheeses
When it comes to crafting the perfect pear apple grilled cheese, the cheese you choose can make all the difference. While classic cheddar is a popular choice, experimenting with other varieties can introduce exciting flavors. Here are a few suggestions:
- Gouda: This semi-soft cheese has a nutty, sweet flavor that beautifully complements the fruits.
- Brie: For a touch of creaminess, consider topping your grilled cheese with some Brie. It melts beautifully and adds a rich texture.
- Fontina: This cheese packs a punch of flavor and melts fantastically, creating a gooey, delightful experience.
Mixing and matching different cheeses not only enhances the flavor but also contributes interesting textures to your sandwich. If you’re feeling adventurous, try adding a sprinkle of herbs like thyme or rosemary to amplify the essence of the dish.
Pairing your pear apple grilled cheese with a crisp side salad or a refreshing smoothie can effortlessly round out your meal. For more ideas on unique grilled cheese combinations, check out this guide on Cheese Pairings.
Whether you stick to the original recipe or venture into variations, your grilled cheese is sure to impress!
Cooking Tips for Pear Apple Grilled Cheese
Creating the perfect pear apple grilled cheese is all about balancing flavors and textures. Here are some handy tips to elevate your dish:
Choosing the Right Fruits
Opt for firm, ripe pears and apples that complement each other well. Varieties like Bartlett pears and Granny Smith apples are great choices—they add both sweetness and a hint of tartness.
Mastering Caramelized Onions
Caramelize your onions slowly over medium-low heat to develop their rich sweetness without burning. Add a splash of vegetable broth or balsamic vinegar near the end for an extra layer of flavor.
Cheese Matters
For the grilled cheese, choose a blend of cheeses. A sharp cheddar can enhance the overall taste while a creamy brie will add a luxurious mouthfeel. Make sure to shred or slice them thinly for even melting.
Cooking Technique
Use a non-stick skillet or a cast iron skillet for even cooking. Butter the outside of the bread generously for a golden brown finish. Flip your sandwich only when the first side is perfectly crispy.
Get Creative
Consider adding Turkey Bacon or Chicken Ham for a savory twist, turning a classic dish into something truly gourmet.
Remember, if you’re ever curious about pairing suggestions or techniques, resources like Serious Eats and Food52 can offer fantastic insights! Happy cooking!
Serving Suggestions for Pear Apple Grilled Cheese
When it comes to elevating your pear apple grilled cheese, thinking beyond the sandwich itself can make all the difference. Here are some delightful ways to serve this dish that will leave your taste buds dancing.
Pair with Fresh Sides
Consider serving your grilled cheese alongside a light arugula salad, tossed with a zingy lemon vinaigrette. The peppery greens will beautifully contrast the sweetness of the pear and apple. For a heartier option, a bowl of butternut squash soup will provide a warm, comforting balance.
Add Savory Companions
If you’re in the mood for something more substantial, try pairing your pear apple grilled cheese with turkey bacon or chicken ham. The salty, savory flavors will enhance the sweet notes of the fruit, creating a perfect harmony. For a crunchy texture, serve some oven-baked sweet potato fries on the side.
Explore Beverage Options
Consider a refreshing iced herbal tea or sparkling apple cider to sip alongside your meal. These beverages complement the sweetness of the grilled cheese and offer a delightful contrast to the richness of the cheese.
By thoughtfully selecting your accompaniments, you’ll transform a simple meal into something extraordinary. Plus, your guests will be thoroughly impressed!
Time breakdown for Pear Apple Grilled Cheese
Preparation time
Getting ready to indulge in this pear apple grilled cheese delight takes about 10-15 minutes. This is your time to slice up those delicious fruits and onions while gathering all your ingredients. Feel free to take your time — it’s all part of crafting that perfect sandwich!
Cooking time
Once you’re all set, the cooking process will require around 15-20 minutes. This includes caramelizing those onions to achieve a sweet, golden finish and toasting your sandwich to crispy perfection. Pro tip: Using a non-stick skillet can make this step a breeze.
Total time
In total, you’re looking at about 25-35 minutes from start to finish. Perfect for a quick weeknight dinner or a leisurely weekend brunch! For more tips on time-saving kitchen techniques, you can explore resources like TheKitchn or Bon Appétit. Happy cooking!
Nutritional Facts for Pear Apple Grilled Cheese
When indulging in the delightful flavors of a pear apple grilled cheese with caramelized onions, it’s essential to know what’s going into your meal. Let’s break down some nutritional facts to give you a clear picture of how this unique sandwich fits into your health goals.
Calories
A typical serving of this pear apple grilled cheese contains around 400 to 500 calories, depending on the type of bread and portion of cheese used. This makes it a satisfying choice for lunch or dinner without tipping the scales. For a lighter option, consider using whole grain bread, which not only reduces calories but adds essential nutrients.
Protein
Each serving packs about 15 grams of protein, thanks to the melty cheese and optional add-ins like turkey bacon or chicken ham. Protein is crucial for muscle repair and growth, and it keeps you feeling full longer. Pair your sandwich with a side of fresh fruit or a salad to boost your protein intake and nutrition.
Fiber
With the addition of fresh pears and apples, this grilled cheese offers about 5 grams of fiber per serving. Fiber is vital for digestion and aids in maintaining a healthy gut. Incorporating fiber-rich ingredients can help regulate blood sugar and lower cholesterol levels, making your meal not just delicious but also nutritious.
By enjoying a pear apple grilled cheese, you nurture your taste buds while making a smart choice for your health. For more healthy eating tips, check out resources from Healthline and EatingWell.
FAQs about Pear Apple Grilled Cheese
What can I substitute for sourdough bread?
If sourdough isn’t your thing, no worries! You can swap it out for various breads based on your preference. Here are some tasty alternatives:
- Ciabatta: Its airy texture holds up beautifully and adds a rustic flair.
- Whole Wheat: A healthier option that still gives a nice crunch.
- Multigrain: Perfect for those who enjoy a nutty flavor with their pear apple grilled cheese.
- Rye Bread: For those who appreciate a bit of tanginess.
Don’t be afraid to experiment! Each bread type will bring its own character to your sandwich.
Can I make this sandwich ahead of time?
Absolutely! You can prepare the components of your pear apple grilled cheese ahead of time. Just caramelize the onions and slice your pears and apples in advance. Assemble the sandwich when you’re ready to eat. If you’re planning on reheating it, assemble the sandwich without grilling, then store it in the refrigerator. When you’re ready, simply grill it until crispy.
How do I store leftovers?
If you have leftover pear apple grilled cheese, storing it correctly will keep it delicious for the next day. Here’s how:
- Cool Down: Let the sandwich cool completely before storage.
- Wrap it Up: Use parchment paper or foil to wrap it tightly, preventing it from getting soggy.
- Fridge Storage: Place it in an airtight container and store it in the refrigerator for up to two days.
To enjoy again, pop it back on the grill or in a skillet until the bread crisps up and the cheese melts. You’ll be amazed how good it tastes as a leftover! For more tips on food storage, check out this article on proper food storage techniques.
Conclusion on Pear Apple Grilled Cheese
Bringing together the sweet flavors of pear and apple with the savory goodness of grilled cheese creates an irresistible dish that’s perfect for a cozy meal or an impressive brunch item. The addition of caramelized onions amplifies this pear apple grilled cheese, adding depth and richness. Not only is this recipe delightful to the palate, but it’s also versatile—feel free to play around with different cheeses!
To further elevate your culinary journey, consider pairing this dish with a refreshing side salad or a warm bowl of tomato soup. For deeper insights into flavor pairings, check out this culinary resource that dives into balancing flavors beautifully. Ready to impress at your next gathering? Enjoy!
PrintPear Apple Grilled Cheese with Turkey Bacon and Caramelized Onions
A delicious twist on the classic grilled cheese sandwich, featuring pears, apples, and caramelized onions, enhanced with turkey bacon.
- Prep Time: 10 minutes
- Cook Time: 15 minutes
- Total Time: 25 minutes
- Yield: 2 sandwiches
- Category: sandwiches
- Method: grilling
- Cuisine: American
- Diet: none
Ingredients
- 2 slices bread
- 1/2 cup shredded cheese
- 1 pear, sliced
- 1 apple, sliced
- 2 slices turkey bacon
- 1 onion, sliced
- 2 tablespoons butter
Instructions
- Cook the turkey bacon in a skillet until crisp. Remove and set aside.
- Add sliced onions to the skillet and caramelize them over medium heat.
- Butter one side of each slice of bread, then layer cheese, turkey bacon, pear, apple, and caramelized onions on the unbuttered side.
- Top with another slice of bread, butter side up, and grill in the skillet until golden brown on both sides and cheese is melted.
Notes
- For a vegetarian version, omit the turkey bacon.
- Feel free to use any type of cheese you prefer.
Nutrition
- Serving Size: 1 sandwich
- Calories: 400
- Sugar: 10g
- Sodium: 800mg
- Fat: 20g
- Saturated Fat: 10g
- Unsaturated Fat: 7g
- Trans Fat: 0g
- Carbohydrates: 30g
- Fiber: 2g
- Protein: 15g
- Cholesterol: 30mg