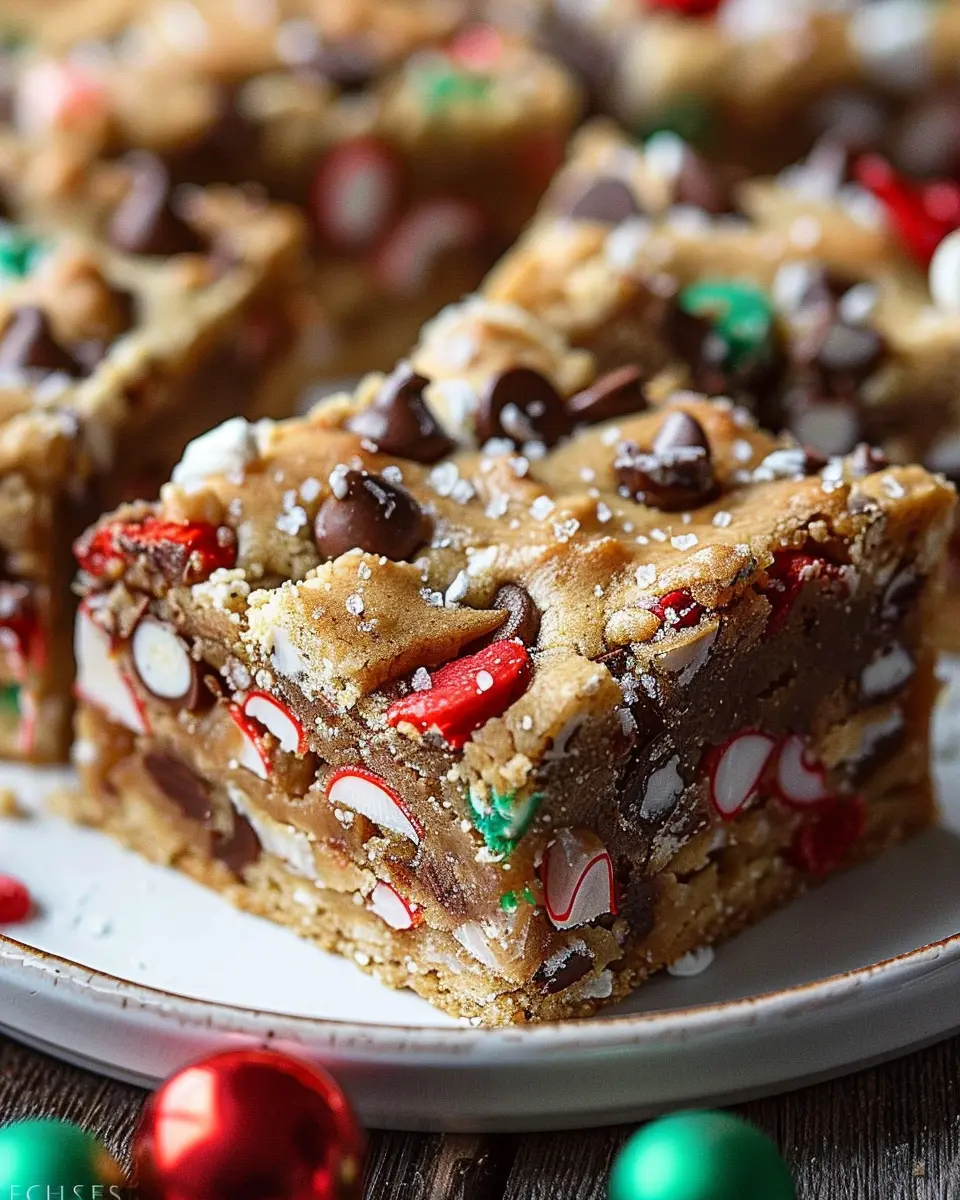
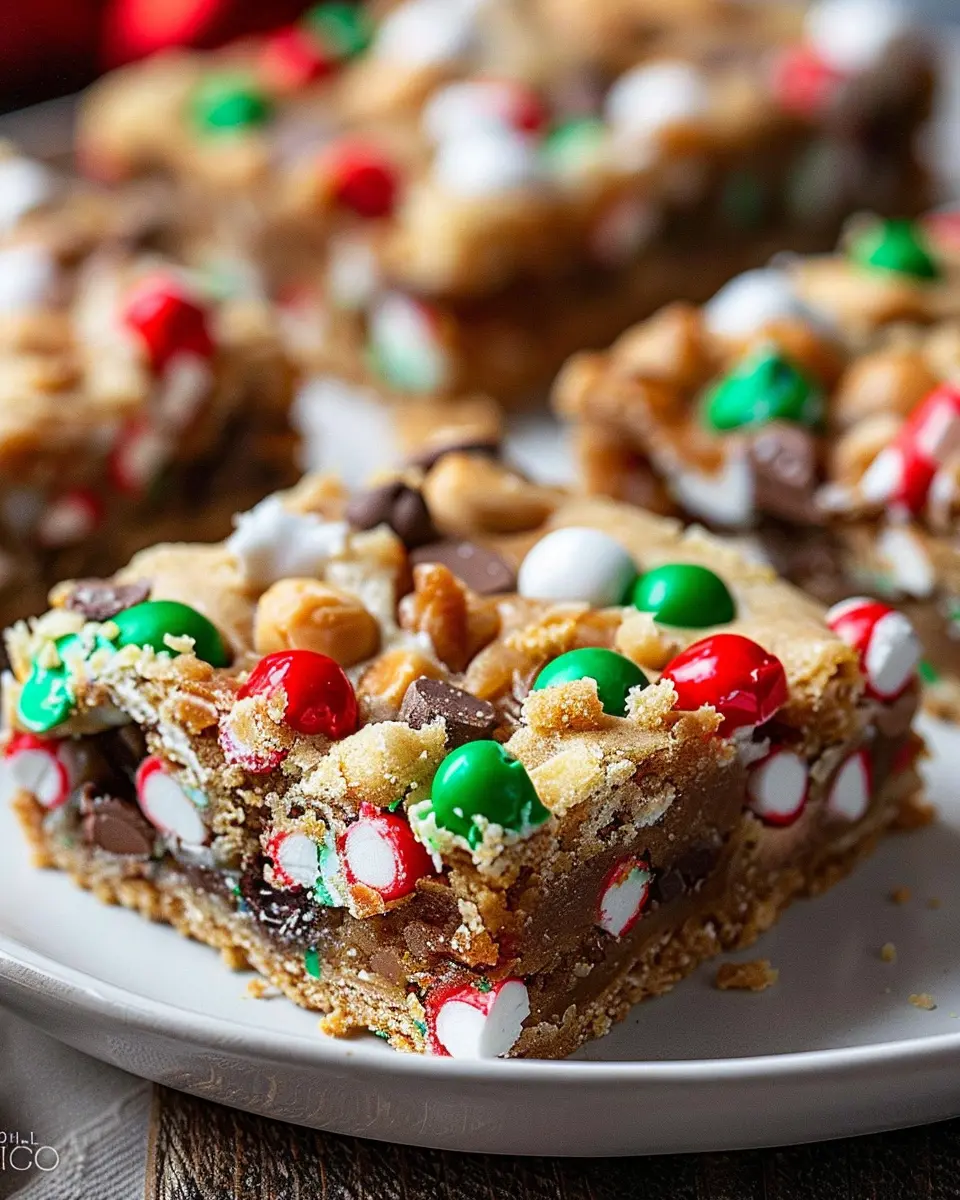
Introduction to Christmas Cookie Bars
When the holiday season rolls around, the aroma of baked goods wafts through kitchens everywhere. One delightful treat that stands out during this magical time is Christmas Cookie Bars. These scrumptious delights combine the best aspects of baking—softness, chewiness, and convenience—all in a beautifully festive package. But what makes Christmas Cookie Bars a holiday favorite? Let’s dive into the reasons!
The Perfect Balance of Flavors and Textures
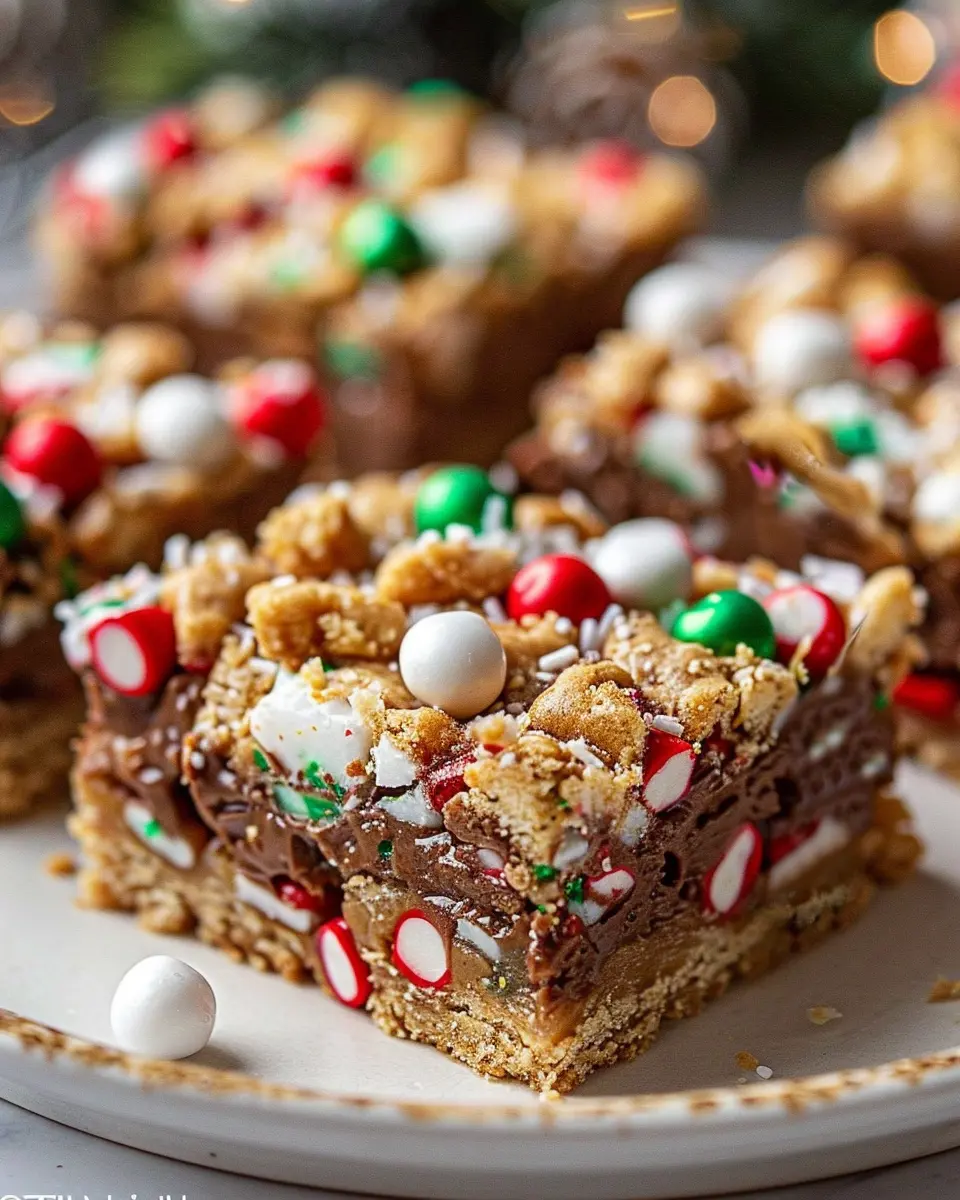
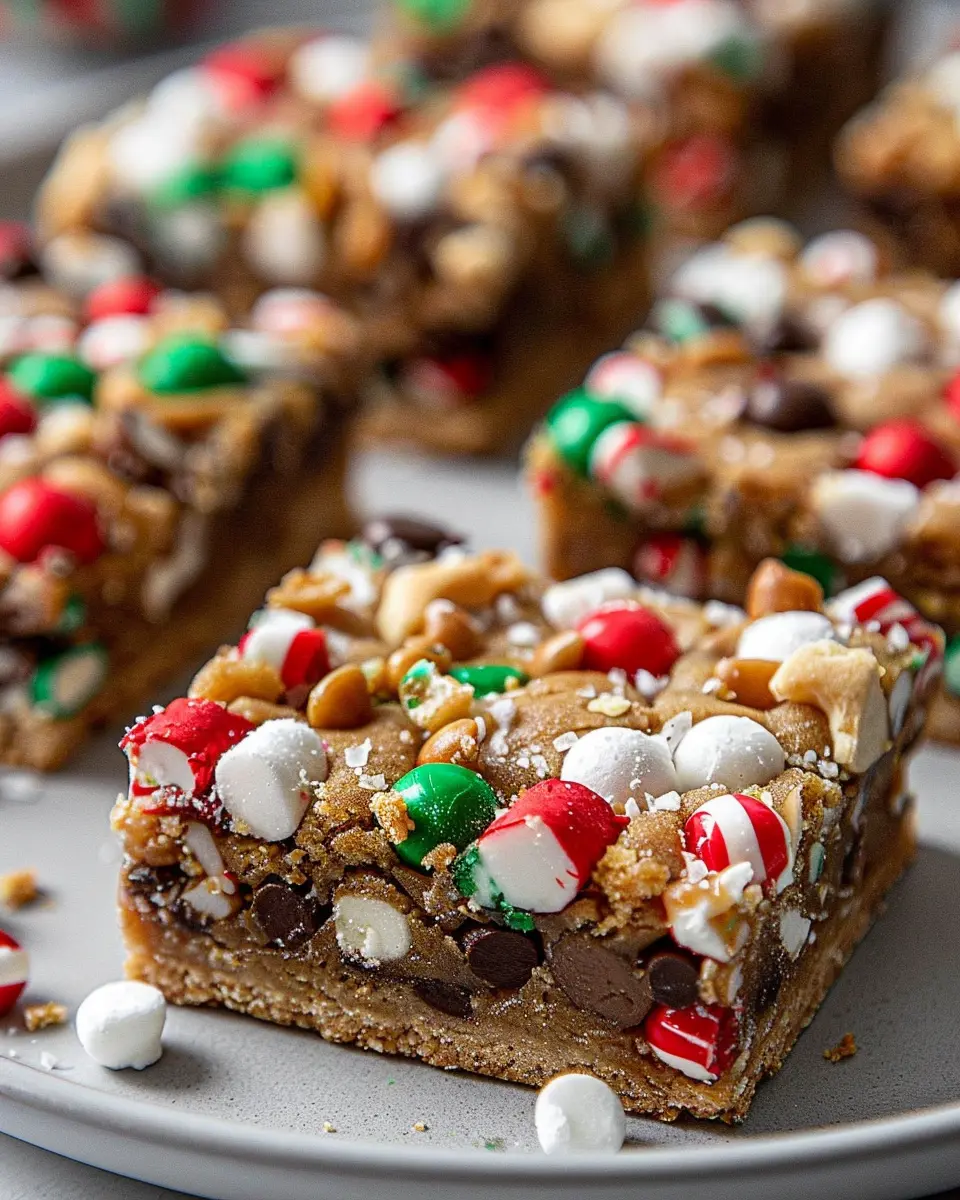
First off, what truly sets Christmas Cookie Bars apart is their unique blend of flavors and textures. With a rich base usually made from brown butter, these bars provide a warm, nutty flavor that embraces festive spices like cinnamon and nutmeg. Topped with a variety of delights—from chocolate chips to festive sprinkles—each bite is a burst of joy. You can easily customize your bars with ingredients like crushed peppermint candies or even white chocolate, ensuring that there’s a delightful surprise in every mouthful.
A Family-Friendly Activity
Another reason for their popularity? Christmas Cookie Bars are perfect for family bonding. Gather your friends or loved ones, put on your favorite holiday tunes, and start mixing and baking. This fun, interactive experience often results in cherished memories, a splendid way to celebrate the holiday spirit. Plus, baking together is a fantastic opportunity to teach younger generations about the value of home-cooked treats.
Easy and Convenient
Let’s face it: the holiday season can be hectic! Between holiday parties and last-minute shopping, you might feel overwhelmed. That’s where these cookie bars come in. They are incredibly easy to make—just mix your ingredients, pour the batter into a pan, and bake! There’s no fussing with rolling dough or cutting out shapes. Want to learn more about other holiday treats? Check out Food Network for some inspiration.
Versatile and Shareable
Lastly, Christmas Cookie Bars are perfect for sharing. They can be easily sliced into squares, making them ideal for potlucks or holiday gatherings. Trust me, you’ll find joy in seeing everyone savoring your creation. So, whether you’re indulging yourself or spreading festive cheer among friends, Christmas Cookie Bars are sure to be a hit.
In the upcoming sections, you’ll discover a foolproof recipe that will let you channel your inner baker this holiday season!
Ingredients for Christmas Cookie Bars
Creating Christmas Cookie Bars is an exciting way to celebrate the holiday season! These festive treats are not just a delight to eat, but they also fill your home with a warm, seasonal aroma. Here’s what you’ll need to whip up these delicious bars:
Essential Baking Ingredients
- Flour: 2 cups of all-purpose flour will serve as the base, ensuring a perfect texture.
- Sugar: Use 1 cup of granulated sugar for sweetness, and consider 1/2 cup of brown sugar for a deeper flavor.
- Butter: 1 cup (2 sticks) of softened butter brings richness and moisture.
- Eggs: 2 large eggs add structure, so be sure to have those ready!
- Baking Powder: 1 teaspoon will help your bars rise.
Flavor Enhancers
- Vanilla Extract: A splash (1 teaspoon) enhances the overall flavor beautifully.
- Salt: Just a pinch (1/2 teaspoon) to balance the sweetness.
- Chocolate Chips or Nuts: About 1 cup of your favorite mix-ins—consider festive options like red and green M&Ms!
Isn’t baking these Christmas Cookie Bars a wonderful way to bond with friends and family? For more tips and inspiration, consider checking out resources like Taste of Home or Food Network for additional recipes and ideas.
Preparing Christmas Cookie Bars
Christmas is a time for joy, love, and of course, delicious treats! If you’re planning to make Christmas cookie bars, you’re in for a delightful baking experience. Let’s dive into the step-by-step process to create these festive delights, perfect for sharing at holiday gatherings or just treating yourself!
Start by Preheating the Oven
The first step in making your Christmas cookie bars is to preheat your oven to 350°F (175°C). Preheating ensures that your bars bake evenly and come out perfectly. This is a crucial step, so don’t skip it! While your oven warms up, you can prepare the rest of your ingredients, which saves time and makes the overall process smoother.
Get the Baking Pan Ready
Next, it’s essential to prepare your baking pan. Use a 9×13-inch pan for the ideal thickness of your cookie bars. Grease it lightly with cooking spray or line it with parchment paper. Lining the pan with parchment allows for easy removal of the bars later, keeping those edges nice and intact—who doesn’t love a good presentation?
Mix the Dry Ingredients
In a large mixing bowl, start measuring and combining your dry ingredients: flour, baking powder, salt, and your favorite spices like cinnamon or nutmeg for that holiday warmth. Whisk these ingredients together until they are thoroughly combined. This step is critical as it helps evenly distribute the leavening agents throughout the flour, which makes for a uniform rise in your cookie bars.
Combine the Wet Ingredients
In another bowl, mix the wet ingredients, including your butter (softened), sugar, brown sugar, eggs, and vanilla extract. Cream these ingredients together until the mixture is smooth and creamy. The color should turn light and fluffy, which indicates they are well combined. Did you know that using fresh, high-quality vanilla extract can greatly enhance the flavor of your cookies?
Merge Wet and Dry Mixtures
Now, it’s time to bring the wet and dry ingredients together! Gradually add your dry mixture to the wet mixture, stirring gently with a spatula or wooden spoon. You want to mix until just combined—be careful not to over-mix, as this can lead to tough cookie bars rather than the soft, chewy bliss we’re aiming for.
Don’t Forget the Mix-Ins!
The fun part of baking Christmas cookie bars is the mix-ins! Whether you prefer chocolate chips, chopped nuts, or dried fruits, fold your desired mix-ins into the batter. Be generous! A good rule of thumb is about 1 to 1.5 cups of mix-ins, but feel free to adjust according to your tastes.
Spread the Batter in the Pan
Using your spatula, spread the batter evenly into your prepared baking pan. This ensures that your Christmas cookie bars will bake uniformly. Make sure to get into those corners—nobody likes undercooked cookies hiding there!
Time to Bake!
Pop the pan into your preheated oven and bake for about 25-30 minutes. Keep an eye on them, as baking times can vary depending on your oven. The bars are done when the edges are golden and the center looks set. A toothpick inserted into the middle should come out with just a few crumbs attached.
Cool and Slice the Bars
Once baked, remove your Christmas cookie bars from the oven and let them cool in the pan for about 10-15 minutes. Then, transfer them to a wire rack to cool completely. This step is essential for achieving the perfect texture. Once fully cooled, slice them into squares or rectangles, and they’re ready to serve!
Feel free to garnish with extra chocolate drizzle or festive sprinkles for that extra holiday flair. Enjoy your baking, and may your kitchen be filled with the delightful scents of Christmas! For more tips on baking, check out this helpful resource on mastering the basics of cookie making.
Variations on Christmas Cookie Bars
When it comes to Christmas Cookie Bars, the possibilities are as endless as your holiday spirit! Why stick to the traditional when you can explore delicious variations? Let’s dive into some festive twists that will surely impress your friends and family.
Chocolate Chip and Nut Variation
If you’re a fan of the classic chocolate chip cookie, why not take it up a notch? This variation combines rich, melty chocolate chips with a mix of toasted nuts, such as pecans or walnuts, for that delightful crunch. Here’s how to get started:
- Substitute half of the chocolate chips with chopped nuts.
- Enhance the flavor with a pinch of sea salt.
- Bake until golden, and enjoy a chew that’s both satisfying and comforting.
This twist is perfect for cozy nights in or sharing at office potlucks.
White Chocolate and Cranberry Variation
For a festive touch, try incorporating white chocolate and dried cranberries into your Christmas Cookie Bars. This combination adds sweetness and a lovely tartness that captures the essence of the holiday season. Here’s a quick guide:
- Use white chocolate chips instead of semi-sweet.
- Add 1 cup of dried cranberries to the batter.
- Drizzle with white chocolate on top once baked for extra flair.
This combination not only tastes wonderful but also looks stunning on a dessert table.
Peanut Butter and Chocolate Variation
For those who can’t resist the pairing of peanut butter and chocolate, this variation of Christmas Cookie Bars is a must-try! Who doesn’t love that creamy, nutty goodness balanced with chocolate?
- Mix in half a cup of creamy peanut butter into the batter.
- Top with chocolate chips for that melty finish.
- Add a sprinkle of chopped peanuts for crunch.
Each bite offers a delightful combination of flavors and textures.
With these variations, you’ll never run out of ways to enjoy your Christmas Cookie Bars. Feel free to get creative and share your unique takes with family and friends. The best part? You can easily customize these recipes to suit your taste—so go ahead and make the holidays a little sweeter! For more festive inspirations, check out resources like Food Network or BBC Good Food for even more ideas.
Baking notes for Christmas Cookie Bars
When it comes to making Christmas Cookie Bars, a few tips can turn this festive treat into a holiday masterpiece.
Choose Quality Ingredients
Opt for high-quality chocolate and spices. Fresh spices can elevate the flavor. Not sure where to start? Check out suppliers like Penzeys Spices for great options.
Mix Full Of Flavor
For a delightful surprise, consider adding some dried cherries or nuts. They really complement the sweetness and add texture. If you prefer a classic take, try using traditional chocolate chips or butterscotch morsels.
Time Matters
Be mindful of baking time! Overbaking can lead to dry bars. Start checking a few minutes before the suggested time; every oven is slightly different.
Cool Properly
After baking, let your Christmas Cookie Bars cool completely in the pan before slicing. This prevents them from crumbling and gives them that perfect chewy texture. Have patience—it’s worth it!
By keeping these baking insights in mind, you’ll create a delicious treat that friends and family will rave about! Feel free to share your creations on social media; I’d love to see how yours turn out!
Serving Suggestions for Christmas Cookie Bars
When it comes to Christmas Cookie Bars, the fun doesn’t stop at just baking them! Here are some delightful serving suggestions to make your holiday gatherings even sweeter.
Delightful Pairings
Consider serving these luscious bars with a variety of accompaniments:
- Fresh Fruit: A vibrant fruit platter, featuring berries and citrus, can bring a refreshing contrast to the sweet, rich flavors of your cookie bars.
- Hot Cocoa: Nothing says festive quite like a warm cup of hot chocolate. Jazz it up with some marshmallows or whipped cream for an indulgent touch.
Presentation Ideas
How you present your Christmas Cookie Bars can elevate their appeal:
- Tiered Dessert Stand: Place your bars on a decorative tiered stand. This adds a lovely visual element and makes it easy for guests to grab a piece.
- Personalized Packaging: Thinking of gifting? Wrap individual bars in decorative paper or boxes for a personal touch that shows you care.
Making the Most of Leftovers
Don’t be surprised if you have some leftover bars! Store them in an airtight container for up to a week. They can also be frozen—just cut them into squares and layer with parchment paper to prevent sticking. When you’re ready to enjoy, let them thaw at room temperature.
These serving suggestions will surely impress your guests and make your Christmas Cookie Bars the highlight of the holiday spreads! If you want more festive ideas, check out sites like Taste of Home and Martha Stewart for inspiration.
Tips for Making Perfect Christmas Cookie Bars
Creating delightful Christmas Cookie Bars is a wonderful way to celebrate the holiday season, and a few simple tips can make all the difference. Here’s how to ensure your cookie bars turn out perfectly every time.
Use Quality Ingredients
Using high-quality ingredients is essential for achieving great flavor and texture. Opt for real butter, fresh eggs, and quality chocolate. You’d be surprised how much better your bars taste with just a few premium ingredients!
Don’t Overmix the Batter
Mixing your dough just until the ingredients are combined ensures your cookie bars remain tender. Overmixing can lead to tougher bars, which we definitely want to avoid!
Experiment with Flavor Combinations
Don’t be afraid to get creative! You can mix in nuts, dried fruit, or even sprinkles for a festive touch. Exploring unique flavor combinations can elevate your Christmas Cookie Bars to the next level.
Bake at the Right Temperature
Baking at the correct temperature is key to evenly cooked cookie bars. Make sure your oven is preheated and consider investing in an oven thermometer for accuracy. This can prevent undercooked or overbaked treats—what a disaster that would be!
Allow to Cool Before Cutting
Resist the urge to cut into your cookie bars right out of the oven! Allowing them to cool will help them maintain their shape.
With these tips, you’re well on your way to creating delicious, festive Christmas Cookie Bars that will impress your friends and family. Happy baking! For more recipes and baking tips, check out King Arthur Baking for inspiration.
Time details for Christmas Cookie Bars
When you’re ready to whip up a delightful batch of Christmas Cookie Bars, time management is key! Here’s how it breaks down:
Preparation time
Getting down to business, you’ll want to allocate 15-20 minutes for preparation. This includes gathering your ingredients, measuring them out, and mixing the batter. It’s a great time to crank up your favorite holiday playlist!
Baking time
As your Christmas Cookie Bars bake, plan for 25-30 minutes in the oven. The wonderful aroma will fill your kitchen, making it hard to wait!
Total time
In total, you’ll invest about 45-50 minutes from start to finish. Just enough time to prep some hot cocoa while you let your bars cool after baking. For more holiday dessert inspiration, check out this delicious baking guide!
Happy baking!
Nutritional information for Christmas Cookie Bars
Are you curious about the nutritional profile of those delightful Christmas Cookie Bars? Let’s break it down!
Calories
Each serving of these festive bars contains approximately 250 calories. This makes them a more indulgent treat during the holiday season, so enjoy them in moderation alongside your favorite beverages!
Protein
If you’re looking to balance your sweet treats, these Christmas Cookie Bars provide about 3 grams of protein per serving. While they’re not a primary protein source, pairing them with a glass of milk can boost your overall protein intake and make a satisfying combination.
Sodium
When it comes to sodium, you can expect around 150 milligrams per serving. This isn’t too high, but if you’re watching your salt intake, it’s always a great idea to enjoy these bars as an occasional treat rather than an everyday snack.
For more information on nutritional guidelines, check out resources from the USDA and Harvard Health. Enjoy your holiday baking and happy indulging!
FAQs about Christmas Cookie Bars
Can I make these cookie bars ahead of time?
Absolutely! Christmas Cookie Bars are perfect for preparing in advance. You can bake them a day or two before your event. Simply allow the bars to cool completely, then cut them into squares and store them in an airtight container. This not only saves you time on the big day but also allows the flavors to mingle and deepen, making them even more delicious!
How should I store my Christmas Cookie Bars?
To keep your cookie bars fresh, store them in an airtight container at room temperature for up to a week. If you prefer them chilled, pop them in the fridge, but remember they might lose a bit of that gooey texture. If you need tips on proper storage practices, check out resources from The Spruce Eats for detailed food preservation strategies.
Can I freeze Christmas Cookie Bars?
Yes, you can easily freeze your Christmas Cookie Bars! To do so, wrap them tightly in plastic wrap and then place them in a freezer-safe bag. They can last for up to three months in the freezer. When you’re ready to enjoy them, simply thaw them overnight in the fridge—not only does this save time, but it’s also a great way to have a festive treat ready when those cookie cravings hit.
Whether you’re sharing with friends or enjoying them solo, these Christmas Cookie Bars are a wonderful way to celebrate the season!
Conclusion on Christmas Cookie Bars
In wrapping up our delightful journey into the world of Christmas Cookie Bars, it’s clear these treats are more than just sweet indulgences; they’re a way to create cherished memories with family and friends. Their versatility allows you to incorporate various flavors and mix-ins, making them a perfect dessert for any gathering.
As you try out this recipe, consider adding your personal touch—whether it’s a dash of peppermint or a handful of nuts. Remember, baking is as much about creativity as it is about technique. So, roll up your sleeves, embrace the holiday spirit, and enjoy every bite of your delicious Christmas Cookie Bars. Happy baking!
For more inspiration, visit The Kitchn or check out Joy of Baking for tips and tricks to elevate your baking skills.
PrintChristmas Cookie Bars: Easy Recipes for Festive Indulgence
Delight in the sweet and festive flavors of Christmas Cookie Bars with simple and enjoyable recipes that are perfect for the holiday season.
- Prep Time: 15 minutes
- Cook Time: 30 minutes
- Total Time: 45 minutes
- Yield: 24 bars
- Category: Desserts
- Method: Baking
- Cuisine: American
- Diet: Vegetarian
Ingredients
- 2 cups all-purpose flour
- 1 cup granulated sugar
- 1 cup brown sugar, packed
- 1 cup unsalted butter, melted
- 3 large eggs
- 1 teaspoon vanilla extract
- 1 teaspoon baking powder
- 1/2 teaspoon salt
- 2 cups chocolate chips
Instructions
- Preheat your oven to 350°F (175°C).
- In a mixing bowl, whisk together the melted butter, granulated sugar, and brown sugar until smooth.
- Add in the eggs and vanilla extract, mixing until well combined.
- In another bowl, combine the flour, baking powder, and salt. Gradually incorporate this dry mixture into the wet ingredients.
- Fold in the chocolate chips.
- Spread the batter evenly in a greased baking pan.
- Bake for 25-30 minutes or until golden brown and a toothpick inserted comes out clean.
- Let cool completely before cutting into bars and serving.
Notes
- For added flavor, consider mixing in nuts or dried fruits.
- These bars can be customized with different types of chocolate.
Nutrition
- Serving Size: 1 bar
- Calories: 220
- Sugar: 18g
- Sodium: 100mg
- Fat: 10g
- Saturated Fat: 6g
- Unsaturated Fat: 2g
- Trans Fat: 0g
- Carbohydrates: 32g
- Fiber: 1g
- Protein: 3g
- Cholesterol: 50mg