Introduction to Cheeseburger Sliders
If you’re a young professional juggling a busy schedule, finding time to cook can sometimes feel like a Herculean task. That’s where the beauty of cheeseburger sliders steps in. These tiny gems offer a blend of convenience and indulgence, making them an ideal choice for anyone with a full plate—literally and figuratively!
Why Cheeseburger Sliders are the Perfect Meal for Young Professionals
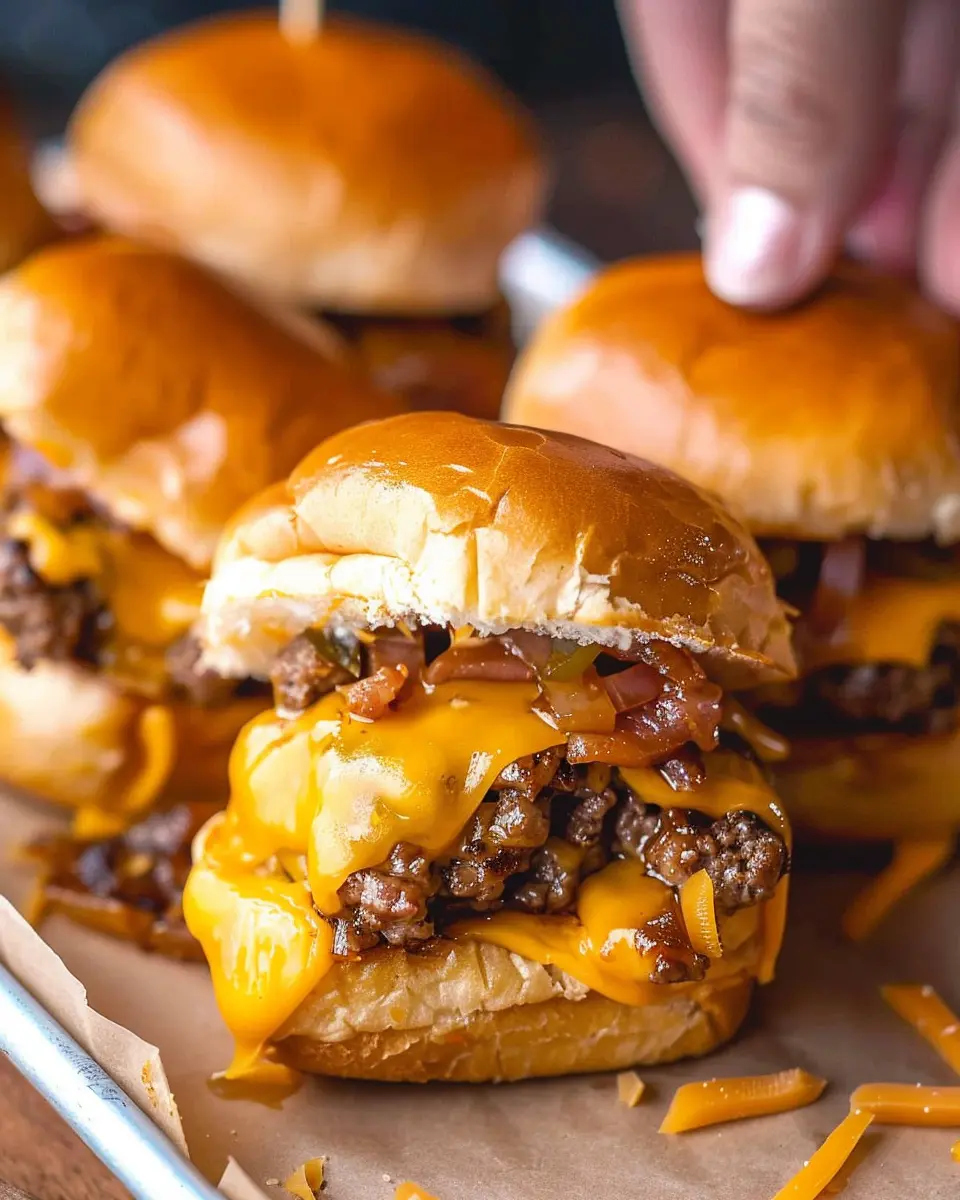
Cheeseburger sliders are not just miniature versions of their full-sized counterparts; they pack a punch of flavor and flexibility. Imagine biting into a juicy beef patty, perfectly complemented by melted cheese and your favorite toppings—all in a compact form that makes dinner enjoyable and manageable.
Here’s why they resonate so well with young professionals:
-
Quick and Easy Preparation: In just about 30 minutes, you can whip up a batch of sliders, making them ideal for weeknight dinners or unexpected guests. Need a little extra guidance? Check out this easy slider recipe that breaks the process down step-by-step.
-
Versatile Toppings and Ingredients: Want to customize your sliders? Go for it! Top them with sautéed mushrooms, spicy jalapeños, or even switch things up with turkey bacon or chicken ham. Versatility means everyone can enjoy their sliders just the way they like.
-
Great for Meal Prep: Preparing meals in advance is a savvy habit, and sliders are perfect for that. You can assemble them in advance and simply heat them up when hunger strikes. This is not just a time-saver; it’s a way to ensure you always have something delicious on hand without resorting to takeout.
-
Perfect for Social Gatherings: When friends drop by or you’re hosting a game night, sliders are an effortless crowd-pleaser. Everyone loves a good burger, and with sliders, guests can try a variety of flavors without feeling too full.
The Balance Between Taste and Health
While sliders may seem indulgent, you can easily make healthy swaps, like opting for lean beef or incorporating fresh veggies. Plus, mindful eating allows for enjoying flavors without derailing your wellness goals.
So, whether you’re looking for a quick weeknight meal, an entertaining dish, or a meal prep solution, cheeseburger sliders are sure to deliver satisfaction and ease. They’re not just food; they’re an experience waiting for you!

Ingredients for Cheeseburger Sliders
Essential Ingredients for the Best Cheeseburger Sliders
Ready to transform your weeknight dinners into something special? The key to mouthwatering cheeseburger sliders lies in using the freshest ingredients. Here’s what you need:
- Ground beef: Go for a blend with 80% lean and 20% fat for moisture and flavor.
- Slider buns: Soft, fluffy buns are a must; consider brioche for extra indulgence.
- Cheese: Classic American cheese melts beautifully, but feel free to get adventurous with cheddar or pepper jack.
- Seasonings: Keep it simple with salt, pepper, and maybe a dash of garlic powder for that extra zing.
- Toppings: Lettuce, tomatoes, and pickles are essential for that classic vibe.
Optional Add-ins for a Unique Twist
Want to switch things up? Here are some creative add-ins to elevate your cheeseburger sliders:
- Turkey bacon: For a smoky crunch without the heaviness.
- Chicken ham: Adds a savory depth and keeps things interesting.
- Avocado slices: Creaminess that balances the richness of the beef.
- Sautéed mushrooms: Earthy goodness that pairs perfectly with cheese.
These ingredients will help you create sliders that are not only delicious but unforgettable! For more tips on crafting the ultimate slider experience, check out resources like Serious Eats and Bon Appétit. Your taste buds will thank you!
Preparing Cheeseburger Sliders
Cheeseburger sliders are the ultimate crowd-pleaser and perfect for any occasion, from game nights to casual family dinners. Follow these easy steps to create mouthwatering sliders that will have everyone coming back for seconds. Let’s dive into each step!
Gather and Prepare Your Ingredients
To get started on your cheeseburger sliders, it’s essential to gather all the necessary ingredients. Here’s what you’ll need:
- Ground Beef: About 1 pound of good-quality ground beef (80/20 blend is ideal for flavor).
- Turkey Bacon: For that crispy, smoky flavor; around 4-5 slices.
- Chicken Ham: Optional, for those who want an extra layer of flavor.
- Slider Buns: A pack of mini slider buns or Hawaiian rolls for that sweet touch.
- Cheese: American or cheddar cheese slices, depending on your preference.
- Onions: 1 medium onion, finely chopped.
- Condiments: Ketchup, mustard, and pickles for assembly.
- Seasonings: Salt, pepper, and garlic powder to taste.
Once you’ve gathered everything, give your ingredients a quick wash (like the onions!) and chop up what needs to be prepped. It’s amazing how much easier cooking becomes when everything is within arm’s reach!
Sauté the Ground Beef and Onions
Now, let’s work on the heart of your sliders!
- Heat a skillet over medium heat and add a drizzle of olive oil. Once hot, toss in the chopped onions. Sauté them until they’re soft and translucent (about 3-4 minutes).
- Next, add your ground beef to the skillet. Break it up with a spatula and cook until it’s browned (around 7-10 minutes). This is the moment where that enticing aroma wafts through your kitchen, making you feel like a gourmet chef.
- Don’t forget to season your meat with salt, pepper, and a dash of garlic powder for that extra kick.
Cooking tips can often be found on culinary websites like Serious Eats, where they emphasize the importance of seasoning at multiple stages to enhance flavors.
Mix in the Flavorful Sauces
With the beef and onions sautéed, it’s time to add some depth.
- Stir in your favorite sauces: Mix equal parts ketchup and mustard with a splash of Worcestershire sauce. This blend takes your sliders from ordinary to phenomenal in just a few minutes.
- If you’d like a little spice, feel free to add hot sauce to taste. Also, consider incorporating BBQ sauce for a sweet twist.
Assemble Your Sliders
Now comes the fun part: assembly!
- Preheat your oven to 350°F (175°C).
- Take your slider buns and slice them in half horizontally while keeping them attached.
- In a baking dish, place the bottom half of the buns, then spoon the beef mixture evenly over. Add a layer of Turkey Bacon and optionally, slices of Chicken Ham on top.
- Top with cheese slices, and finally place the remaining buns on top.
Bake to Perfection
Now that your sliders are assembled, it’s time to bake them to golden perfection.
- Brush a little melted butter on top of the slider buns for a beautiful finish.
- Bake your sliders in the preheated oven for 15-20 minutes, or until the cheese is melted and the buns are golden brown.
As they bake, the delightful aroma will fill your home, tempting even the most disciplined eaters! Once out of the oven, let them cool for a few minutes before serving. Offer a variety of toppings like pickles, lettuce, or onions, and let your guests customize their cheeseburger sliders.
With these steps, you’ll whip up a delicious batch of cheeseburger sliders that will be the highlight of any gathering. Happy cooking!
Variations on Cheeseburger Sliders
Looking to shake things up at your next gathering? These cheeseburger sliders aren’t just a one-way street! Let’s delve into some delicious variations that will cater to everyone’s palate.
Spicy Jalapeño Cheeseburger Sliders
If you love a kick in your meal, these sliders are for you! Incorporate diced jalapeños into the ground beef mixture, and don’t forget to top them with pepper jack cheese for that extra spice. To balance the heat, a dollop of creamy ranch dressing will bring everything together beautifully. Trust me, this combo is a party favorite! For more ideas on spicy recipes, check out Chili Pepper Madness.
BBQ Cheeseburger Sliders with Chicken Ham
For a unique twist, try BBQ cheeseburger sliders with chicken ham. Cook the chicken ham in a rich barbecue sauce and place it on your slider buns with cheddar cheese. This not only adds a delightful sweetness but also keeps things lighter. Serve with pickles for that extra crunch, and watch your guests rave about them!
Vegetarian Cheeseburger Sliders
Don’t forget about your vegetarian pals! These sliders can easily transform with some fantastic plant-based patties. Use black beans, quinoa, or lentils as your base, and season with garlic and herbs for flavor. You can top them off with avocado, fresh veggies, and a zesty sauce for a refreshing take on the classic. These sliders are not just for vegetarians; they’re a hit with everyone.
Each of these cheeseburger slider variations offers a unique flavor experience, ensuring that your next event is anything but ordinary. Let us know which one you’ve tried or loved the most!
Cooking Tips and Notes for Cheeseburger Sliders
Best Ways to Store Leftovers
Storing leftover cheeseburger sliders? It’s a breeze! To keep those flavors intact, wrap each slider in foil or place them in an airtight container. This method prevents them from drying out and keeps them fresh for up to three days in the fridge. If you’re looking to keep them longer, consider freezing them. For best results, freeze the sliders in a single layer, then transfer them to a freezer-safe bag after they’re fully frozen. This prevents sticking and makes it easy to grab just what you need.
Reheating Tips for Optimal Flavor
When it’s time to enjoy those leftovers, reheating is key to maintaining that juicy goodness. For the best texture, pop the sliders in a preheated oven at 350°F for about 10–15 minutes. Want a quick fix? Microwave them for about 30 seconds, but cover them with a damp paper towel to avoid that dreaded sogginess.
By following these tips, you’re guaranteed to relish every bite of your cheeseburger sliders just as much as when they were fresh! For more ideas, check out this guide on food storage for extra tips.

Serving Suggestions for Cheeseburger Sliders
When it comes to Cheeseburger Sliders, the right accompaniments can turn a simple gathering into a memorable feast. Let’s explore some fun side dishes and creative ways to present your sliders that will surely impress your guests!
Fun Side Dishes to Complement Your Sliders
Pairing sides with your sliders can enhance flavors and add variety. Consider serving:
- Sweet Potato Fries: Their natural sweetness balances the savory flavors of the sliders.
- Coleslaw: A crunchy slaw brings a refreshing contrast and adds a crunchy texture.
- Pickles: You can never go wrong with pickles—perfect for that extra zing!
For a lighter option, try a garden salad with a zesty vinaigrette. According to Today’s Dietitian, incorporating fresh vegetables can elevate not just taste, but also nutrition.
Creative Presentation Ideas for Parties
Presentation can elevate your Cheeseburger Sliders from everyday meals to party showstoppers. Try these ideas:
- Mini Cart Display: Arrange your sliders in a decorative cart or tiered stand for a fun, eye-catching presentation.
- Label Each Slider: Use cute labels or chalkboard signs to differentiate toppings or flavor variations.
- Slider Stands: You can find these or DIY to create a rustic look.
Want to impress your guests further? Check out The Spruce Eats for trendy ideas on party presentations and serving styles. With these tips, your sliders are not just a meal but an experience!
Time Breakdown for Cheeseburger Sliders
Preparation Time
Getting started on your Cheeseburger Sliders is quick and easy! You’ll need about 15 minutes to gather your ingredients, prep your toppings, and form the patties. This is an excellent time to chop some fresh veggies or mix up your favorite sauces for that extra flavor.
Cooking Time
Next comes the cooking! These tasty sliders only take about 20 minutes to grill up perfectly. Keep an eye on them to ensure that they reach that juicy goodness we all love—after all, nobody wants a dry slider!
Total Time
In total, you’re looking at around 35 minutes from start to finish. It’s perfect for a weekdays dinner or a fun weekend gathering with friends. With such a quick turnaround, you can even enjoy them during a movie night—check out this link for some great pairing ideas to elevate your evening!
Nutritional Facts for Cheeseburger Sliders
Calories per Slider
Each Cheeseburger Slider typically contains around 250 calories, making them a delicious yet manageable indulgence. When you’re craving comfort food that won’t derail your healthy eating goals, these sliders strike the right balance.
Nutritional Breakdown
A well-balanced slider boasts:
- Protein: Approximately 12 grams, thanks to the ground beef and cheese
- Fat: About 15 grams, which can be adjusted by swapping in Turkey Bacon
- Carbohydrates: Roughly 18 grams, primarily from the slider bun
For a deeper look into the nutrition of beef and other protein sources, check out Choose My Plate.
Healthier Alternatives in the Recipe
Want to make your Cheeseburger Sliders even better for you? Here are some simple swaps:
- Lean beef can replace standard ground beef for lower fat content.
- Consider swapping regular cheese for a reduced-fat option or vegan cheese if you’re looking for dairy-free choices.
- Use whole-grain slider buns to boost fiber content.
Remember, eating can be both enjoyable and nutritious! With these tips in mind, you can savor your Cheeseburger Sliders guilt-free. For additional insights on healthier recipes, explore The American Heart Association.
FAQs about Cheeseburger Sliders
Can I freeze Cheeseburger Sliders?
Absolutely! Cheeseburger sliders are perfect for freezing. After baking, let them cool completely, then wrap each slider tightly in plastic wrap or aluminum foil, and place them in an airtight container or freezer bag. They can last up to three months in the freezer. When you’re ready to enjoy them, just thaw in the fridge overnight and reheat gently in the oven or microwave for a quick meal.
What’s the best way to customize my sliders?
Customization is where you can really make cheeseburger sliders your own! Consider these ideas:
- Cheese Varieties: Beyond classic cheddar, try pepper jack for some heat or gouda for a creamy twist.
- Sauces: Add your favorite sauces like BBQ, ranch, or even a spicy sriracha mayo for an extra kick.
- Toppings: Think beyond just lettuce and tomato. Pickles, jalapeños, or even avocado can elevate your sliders.
- Meat Options: You can swap ground beef for turkey or even chicken if you prefer lighter options.
Feel free to explore ideas and find what tickles your taste buds!
How do I prevent soggy buns?
Soggy buns can be a deal-breaker, but fear not! Here are some tips to keep them perfectly intact:
- Use a Barrier: Consider spreading a thin layer of mayonnaise or butter on the insides of your buns before filling them. This creates a moisture barrier.
- Don’t Overload with Sauce: While sauces are delicious, moderation is key. Too much can definitely lead to sogginess.
- Serve Fresh: If you’re preparing for a gathering, assemble the sliders just before serving. This keeps the buns firmer.
If you’re looking for more tips on keeping your burgers and sliders deliciously dry, check out articles on seriouslygood.com for expert advice!
Conclusion on Cheeseburger Sliders
Recap of Why These Sliders are a Must-Try for Young Professionals
In the whirlwind of our daily lives, finding quick and satisfying meals can be a challenge. That’s where cheeseburger sliders come in! These delightful bites are not only easy to prepare but also incredibly versatile—perfect for meal prep or spontaneous gatherings.
Imagine inviting friends over after a long week at work and serving these delicious sliders with a side of fresh veggies or a vibrant salad. Their bite-sized nature means you can indulge without overdoing it. Plus, who could resist a gooey cheese melt paired with perfectly seasoned turkey bacon or chicken ham?
Next time you need a quick meal solution or a crowd-pleaser, these sliders will surely steal the show. Check out Serious Eats for more fun slider variations and ideas!
PrintCheeseburger Sliders with Turkey Bacon: Easy and Delicious Treats

Discover the delicious combination of turkey bacon and cheeseburger sliders in this easy recipe.
- Prep Time: 15 minutes
- Cook Time: 20 minutes
- Total Time: 35 minutes
- Yield: 12 sliders
- Category: Appetizer
- Method: Baking and Skillet Cooking
- Cuisine: American
- Diet: Gluten-Free
Ingredients
- 1 pound ground turkey
- 8 slices turkey bacon
- 1 cup shredded cheddar cheese
- 12 slider buns
- 1 tablespoon Worcestershire sauce
- 1 teaspoon garlic powder
- 1 teaspoon onion powder
- Salt and pepper to taste
- 2 tablespoons mayonnaise
- 1 tablespoon mustard
Instructions
- Preheat the oven to 350°F (175°C).
- Cook the turkey bacon in a skillet until crispy, then chop it up.
- In a bowl, mix ground turkey, chopped turkey bacon, Worcestershire sauce, garlic powder, onion powder, salt, and pepper.
- Shape the mixture into small patties.
- Cook the patties in the skillet until browned on both sides.
- Place the cooked patties on slider buns and top with cheddar cheese.
- Put the assembled sliders in the oven for about 5 minutes or until the cheese melts.
- Mix mayonnaise and mustard, then spread on top of sliders before serving.
Notes
- For extra flavor, add your favorite seasonings to the turkey mixture.
- This recipe can be easily doubled for larger gatherings.
Nutrition
- Serving Size: 1 slider
- Calories: 200
- Sugar: 1g
- Sodium: 350mg
- Fat: 10g
- Saturated Fat: 2g
- Unsaturated Fat: 7g
- Trans Fat: 0g
- Carbohydrates: 18g
- Fiber: 1g
- Protein: 15g
- Cholesterol: 70mg